Free · No sign-up needed · Your answers stay in your browser
House Decoder: what's likely inside a house built in your year
Enter the year your house was built and your state. You'll see what was common in homes then. For each item: why it matters, how to spot it safely, when to stop, and what to ask your inspector.
House Decoder list from safehomeexperts.com/house-decoder · facts checked September 25, 2026 · a starting point, not an inspection
Because of your home's age
Common when your house was built, or in repairs made before a rule changed. Remodels may have replaced or added some of them.
Rules for your state
State laws, insurance rules, and programs that apply where you live.
Checks every home needs
Safety checks for homes of any age. Most take a few minutes.
Only if your home was updated later
These went into homes after yours was built. Check them only if the wiring, panel, pipes, walls, siding, or roof were redone in those years.
Show these items
This list is a starting point, not an inspection. Remodels change what's inside a house. A licensed home inspector or the right specialist has to confirm what you actually have.
AI-generated illustration, not a photo of a real home.
How to use your list
Start with the "Check first" items. Look only at what you can see safely.
Stop where an item says stop. Do not open panels, cut into walls, or disturb old materials.
Print the short list and take it to your home inspector, or to the specialist each item names.
Buying? Ask about these items before your inspection deadline. Selling? Check them before you list.
Browse the full list
Want to see everything first? Open the full list of 76 items, grouped by part of the house. Each one says which homes it applies to and links to its sources. Facts last checked September 25, 2026.
Show all 76 items
Safety devices
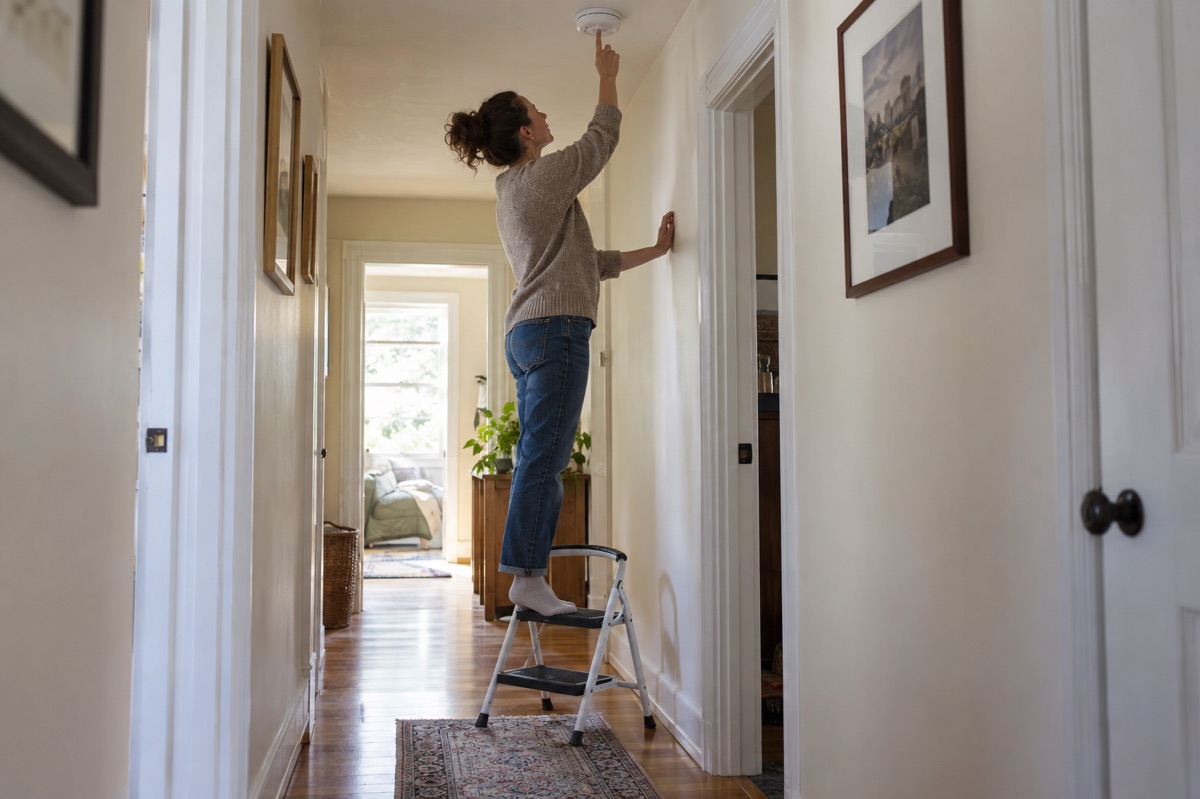
AI-generated illustration, not a photo of a real home.
Smoke alarms 10 or more years old, or missing
Check firstAny homeSafety
Smoke alarms wear out, so replace each one 10 years after the date it was made.
Stop: Do not take down, unwire, or replace a hardwired smoke alarm yourself. Only qualified electricians should install them.
Ask your inspector: “What date is printed on each smoke alarm, and is there a working alarm in each bedroom, outside each sleeping area, and on every level?”
What to do about Smoke alarms 10 or more years old, or missing
Safe first steps
Press the test button on each alarm once a month. Write down the date on each one. Replace battery-only alarms that are 10 or more years old or have no date. Some fire departments put in battery alarms for free. Call their non-emergency line to ask. Florida: if certain remodel work adds or replaces a battery-only smoke alarm, state law says it generally must have a sealed battery that lasts at least 10 years. Some combo, wireless-linked, and monitored alarms are exempt.
Who to call
A licensed electrician for hardwired or linked alarms. Your local fire department's non-emergency line for help with battery alarms.
Ask your inspector
“What date is printed on each smoke alarm, and is there a working alarm in each bedroom, outside each sleeping area, and on every level?”
How to spot it
Look on the back or side of each smoke alarm for the date it was made. If you can't see it without taking down a wired alarm, ask your inspector. An alarm that is 10 or more years old needs replacing. So does one with no date. You should have an alarm inside each bedroom, outside each sleeping area, and on every level.
Why it matters
The sensors in smoke alarms wear out. An old alarm may be slow to warn you of a fire. NFPA and the U.S. Fire Administration say to replace the whole alarm every 10 years. Replace it sooner if it gives an end-of-life warning. Linked alarms protect best. When one sounds, they all sound.
When this applies
Every home. This goes by the date printed on each alarm, not the year the house was built. Homes built or last updated 10 or more years ago may still have their original alarms.
CO alarms warn you about carbon monoxide, a poison gas you cannot see or smell.
Stop: Do not hunt for or fix a CO source yourself. Do not adjust gas appliances or vent pipes. Do not take down or wire a hardwired alarm yourself. Never run a car or engine in the garage, even with the door open.
Ask your inspector: “Is there a CO alarm outside each sleeping area and on every level, and what date is on each one?”
What to do about Carbon monoxide (CO) alarms missing or worn out
Safe first steps
If your home has gas, oil, or propane appliances, a fireplace, or an attached garage, put in CO alarms. NFPA says to place them in each room where someone sleeps, outside each sleeping area, and on every level. You can add battery or plug-in alarms yourself. Hardwired alarms should be put in by an electrician. Test them once a month. Replace each one by its date, or when it gives an end-of-life signal. Have gas appliances, heating equipment, and chimneys inspected every year. If a CO alarm sounds, get everyone outside to fresh air. Then call 911.
Who to call
911 if a CO alarm sounds. A licensed HVAC or gas appliance technician for yearly checks. A chimney professional if you have a fireplace. A licensed electrician for hardwired alarms.
Ask your inspector
“Is there a CO alarm outside each sleeping area and on every level, and what date is on each one?”
How to spot it
Look near the bedrooms for an alarm marked CO or Carbon Monoxide. Some are combined with a smoke alarm. Check the back for the date it was made or a replace-by date. Some models chirp or show END when worn out, even with a new battery. Check the manual for your model.
Why it matters
CO comes from things that burn fuel, like furnaces, water heaters, stoves, fireplaces, and cars. Each year, more than 200 people in the U.S. die from CO poisoning from consumer products. That count does not include fires. The sensors in CO alarms wear out. One major maker, Kidde, says its alarms last 7 to 10 years, depending on the model.
When this applies
Any home with gas, oil, or propane appliances, a fireplace, or an attached garage. It goes by each alarm's date, not the house's age. In Florida, homes and additions built on or after July 1, 2008 with these features must have a CO alarm within 10 feet of each bedroom. Older Florida homes may have none.
Garage door opener that won't reverse or lacks sensors
Check firstAny homeSafety
An automatic garage door should stop and go back up when it hits something or someone.
Stop: Never let a person or pet be under a moving door to test it. Do not pull the emergency release cord unless the door is fully closed. Do not adjust or loosen the springs, cables, or bottom brackets. If the door is out of balance or sticks, have a professional service it.
Ask your inspector: “What year was the garage door opener made, and does the door reverse when it hits a 2x4 laid on the floor?”
What to do about Garage door opener that won't reverse or lacks sensors
Safe first steps
Test the reverse feature once a month. Lay a 2x4 board flat on the floor in the door's path. Close the door. It should reverse when it hits the board. If it doesn't, stop using the opener until it is adjusted, repaired, or replaced. Mount the wall button high, out of children's reach. Keep remotes away from kids.
Who to call
A garage door service professional.
Ask your inspector
“What year was the garage door opener made, and does the door reverse when it hits a 2x4 laid on the floor?”
How to spot it
Look near the floor on each side of the door. Most openers have two small sensors facing each other. These are called electric eyes. They should be about 4 to 6 inches off the floor. Some openers use a sensor strip on the door's bottom edge instead. The motor unit on the ceiling has a label that may show the month and year it was made. Watch the door close. It should reverse if something is in its path.
Why it matters
A garage door that does not reverse can trap and kill a child. A 2011 CPSC safety sheet counted about 73 children killed this way since March 1982. They were ages 2 to 14. CPSC says openers that don't reverse should be repaired or replaced.
When this applies
Any home with an automatic garage door opener. This goes by the opener's age, not the house's. CPSC required reversing systems on openers made after January 1, 1991. Openers made on or after January 1, 1993 must also have extra protection, like electric eyes. Any opener can stop reversing if it is out of adjustment.
A pool or spa drain with an old or broken cover can trap hair or a body and hold a person underwater.
Stop: Do not let anyone swim if a drain cover is missing or broken. Do not remove or install drain covers, or change the pump or pipes, yourself.
Ask your inspector: “Are the pool and spa drain covers domed, uncracked, and firmly attached, and are they still within the life marked on them?”
What to do about Old, flat, or broken pool and spa drain covers
Safe first steps
Teach children to stay away from drains. If a cover is broken, loose, or missing, close the pool or spa until it's fixed. Find each cover's marked life and the year it was put in. Have a pool professional check the covers at least once a year.
Who to call
A licensed pool contractor or pool service professional.
Ask your inspector
“Are the pool and spa drain covers domed, uncracked, and firmly attached, and are they still within the life marked on them?”
How to spot it
Look at the drains on the floor of the pool or spa. Older covers are flat. Newer, safer covers are curved or domed. That shape keeps a body from fully blocking them. Many covers are marked "Life: X Years." That tells how many years the cover can stay in use. Check for covers that are cracked, loose, or missing.
Why it matters
A blocked drain can pull with strong suction. It can trap hair or a body part and hold a child or adult underwater. This is called entrapment. Congress passed the Virginia Graeme Baker Pool and Spa Safety Act to prevent it. Since December 19, 2008, drain covers made or sold in the U.S. must meet a federal anti-entrapment standard.
When this applies
Any home with a pool or spa. Drain covers made or sold since December 19, 2008 must meet a federal standard. Home pools built before about 2009 may still have older flat covers. Covers also crack and wear out, so check them at any age.
Florida pool without a working barrier or pool alarm
Check firstAny homeFlorida onlySafety
Florida requires new home pools, spas, and hot tubs to have at least one safety feature. It must help keep young children out or warn you when they get in.
Stop: Do not prop pool gates open or turn off door alarms. Do not count on any barrier or alarm in place of an adult watching children.
Ask your inspector: “Which Florida pool safety feature does this home have, and does it still work as designed?”
What to do about Florida pool without a working barrier or pool alarm
Safe first steps
Test door alarms, gates, and self-closing doors. They should close and latch on their own. Fix any that don't. Move chairs, grills, and planters away from the fence so kids can't climb over. Ask your city or county which pool rules apply to your home. Some local rules are stricter than state law.
Who to call
A licensed pool or fence contractor. Your city or county building department for local pool rules.
Ask your inspector
“Which Florida pool safety feature does this home have, and does it still work as designed?”
How to spot it
Look for at least one of these five features. First, a fence or wall all the way around the pool. It must be at least 4 feet high with no gaps or footholds. Its gates open outward and close and latch on their own. The latch release must be on the pool side, out of a child's reach. A house wall counts only if no door or window in it opens to the pool. So a screen cage may not count by itself if house doors open into it. Second, an approved safety pool cover. Third, an alarm on every door and window that opens straight to the pool. Fourth, self-closing, self-latching doors to the pool, with the latch at least 54 inches up. Fifth, an in-pool alarm that sounds when someone enters the water. Alarms worn by a child do not count.
Why it matters
When Florida passed this law in 2000, lawmakers found that drowning was the leading cause of death for young children (under age 6) in the state. They said close adult watching is the key protection. A safety feature adds a backup layer when an adult looks away.
When this applies
Florida homes with a pool, spa, or hot tub. Since October 1, 2000, a new home pool must have at least one safety feature to pass final inspection. Pools finished before then were not covered by this state law. Any feature can break or be removed over time.
Older homes may have plain glass in doors and tub or shower enclosures, and it breaks into large, sharp pieces.
Stop: Do not remove, cut, or replace glass panels yourself. Call a glass professional.
Ask your inspector: “Is the glass in the doors, beside the doors, in the tub and shower enclosures, and in large low windows marked as safety glass?”
What to do about Plain glass in doors, showers, and tub enclosures
Safe first steps
List any panels in these spots that have no mark. Keep kids from running or playing near low glass. Teach kids not to push or lean on glass doors. Have a glass pro look at any unmarked panels. Ask the pro whether a guard rail or new safety glass makes sense.
Who to call
A glass or glazing contractor.
Ask your inspector
“Is the glass in the doors, beside the doors, in the tub and shower enclosures, and in large low windows marked as safety glass?”
How to spot it
Check a corner of each glass panel in doors, sliding patio doors, and tub or shower doors. Also check glass beside doors and big windows near the floor. Safety glass usually has a small permanent mark in one corner. The mark is etched or stamped. It names the type of glass, like tempered, and a safety standard. No mark can mean plain glass, but not always. Some small or decorative panes are exempt.
Why it matters
Plain glass breaks into large, sharp pieces. People can be badly cut if they fall or walk into it. Safety glass, like tempered or laminated glass, is made to be less dangerous when it breaks.
When this applies
Federal rules say glass made after July 6, 1977 for doors and tub or shower enclosures must be safety glass. So homes built before about 1978 are most likely to have plain glass there. Glass beside doors and in big low windows follows local building codes, which began at different times. Later homes can have plain glass in those spots too. Older homes may have had glass replaced.
Plastic or foil dryer vent, or a clogged dryer vent
Check firstAny homeSafety
Dryer lint burns easily, and plastic, foil, crushed, or clogged vents let it build up.
Stop: Do not move or disconnect a gas dryer or its gas line yourself. Do not run the dryer if the outside vent is blocked or the duct is crushed.
Ask your inspector: “What is the dryer duct made of, is it crushed or kinked, and does the outside flap open when the dryer runs?”
What to do about Plastic or foil dryer vent, or a clogged dryer vent
Safe first steps
Clean the lint screen before or after every load. While the dryer runs, check that air comes out outside. NFPA says to clean lint out of the vent pipe every three months, or hire a dryer vent cleaning service. For a gas dryer, always hire the service. Have plastic or foil duct replaced with rigid or semi-rigid metal duct. Have a gas dryer inspected by a professional once a year.
Who to call
A dryer vent cleaning service or appliance technician. For a gas dryer, a qualified gas appliance technician.
Ask your inspector
“What is the dryer duct made of, is it crushed or kinked, and does the outside flap open when the dryer runs?”
How to spot it
Look behind the dryer without moving it. A white plastic hose or a thin foil accordion hose is the riskier kind. Rigid or semi-rigid metal duct is safer. Go outside while the dryer runs. You should feel air and see the vent flap open. If clothes are still damp after a normal cycle, the vent may be blocked.
Why it matters
Lint can block air flow and build up heat. That can start a fire. USFA estimated about 2,900 dryer fires a year in residential buildings from 2008 to 2010. Not cleaning was the top cause. Plastic and foil ducts trap lint more easily. They also crush and kink more easily.
When this applies
Any home with a clothes dryer. This does not depend on the house's age. It depends on the duct material and how often the vent is cleaned.
Radon is a radioactive gas from the ground. You can't see or smell it, and a test is the only way to know your level.
Stop: Do not turn off, unplug, or cut into a radon fan or its pipe.
Ask your inspector: “Has this home been tested for radon on the lowest lived-in level, and what was the result and date?”
What to do about Radon: has the home been tested?
Safe first steps
Test the lowest level you live in. Use a test kit or a certified tester. Results are in pCi/L, a unit for how much radon is in the air. If a short-term test shows 4 pCi/L or higher, test again to be sure. EPA says fix the home if the level is 4 or higher. Consider fixing it if the level is between 2 and 4. Test before a big remodel, like finishing a basement. Test again after the work is done. Test again if you start living on a lower level. If there is a radon system, check its gauge and retest every two years. In Florida, sale and rental papers must include a radon notice. The notice is not a test.
Who to call
Your state radon office. In Florida, a radon tester or mitigation company certified by the Florida Department of Health.
Ask your inspector
“Has this home been tested for radon on the lowest lived-in level, and what was the result and date?”
How to spot it
You can't see or smell radon. Only a test tells you the level. Ask the seller for any past radon tests, with results and dates. A radon reduction system is usually a pipe running up the house with a fan. Most have a small gauge that shows if the system is working.
Why it matters
EPA estimates radon causes about 21,000 lung cancer deaths a year. It is the top cause of lung cancer in people who don't smoke. Any home can have a radon problem. That includes new and old homes, sealed and drafty homes, and homes with or without a basement.
When this applies
Every home below the third floor, new or old, with or without a basement. EPA says its county radon zone map should not decide whether a home gets tested.
Tap water that is too hot can burn skin in seconds, especially for young children and older adults.
Stop: Do not open the panels on an electric water heater or adjust gas controls yourself. Have a pro or your utility make the change.
Ask your inspector: “What is the hot water temperature at the faucet, and is the water heater set no higher than 120 degrees?”
What to do about Hot water set too hot (scald risk)
Safe first steps
Ask a plumber, or your gas or electric company, to set the water heater to 120°F. Test at the faucet again a day later. Always test bath water before a child gets in. Stay with young children in the tub. Consider anti-scald devices for tub faucets and shower heads.
Who to call
A licensed plumber, or your gas or electric company. CPSC notes some electric companies do this at no charge.
Ask your inspector
“What is the hot water temperature at the faucet, and is the water heater set no higher than 120 degrees?”
How to spot it
Run hot water at a faucet for 3 minutes. Hold a cooking or candy thermometer in the stream. Keep your fingers out of the water. If it reads above 120°F, the water heater is set hotter than CPSC and NFPA advise.
Why it matters
CPSC says most tap water scald injuries and deaths happen to older adults and children under 5. At 150°F, most adults get a third-degree burn in 2 seconds. At 140°F it takes 6 seconds. At 130°F it takes 30 seconds. CPSC urges setting water heaters to 120°F.
When this applies
Any home with a water heater. This depends on how the heater is set, not the house's age.
An anti-tip bracket is a small metal piece. It keeps a range from tipping forward if someone leans or stands on the open oven door.
Stop: Do not pull out a gas range to add a bracket yourself. Moving it can strain the gas connection. Have an installer or appliance technician do it.
Ask your inspector: “Is the range held in place by an anti-tip bracket?”
What to do about Kitchen range without an anti-tip bracket
Safe first steps
Check for the bracket. If it is missing, contact the range maker. Some will send one at no charge. Don't let kids climb or sit on the oven door. Don't put heavy items on an open oven door or push down on it.
Who to call
The range maker, to get a bracket. An appliance installer or technician to put it in.
Ask your inspector
“Is the range held in place by an anti-tip bracket?”
How to spot it
With a flashlight, look at the lower back corners of the range. Look for a metal bracket on the floor or wall that holds a back leg of the range. The owner's manual shows where the bracket goes.
Why it matters
A range can tip over if a child climbs on the open oven door. Hot food and pots can fall on the child too. From 2000 to 2008, CPSC got reports of 13 deaths from stoves, ovens, and ranges tipping over. Many were children younger than 10.
When this applies
Any home with a free-standing range. This goes by the range, not the house. Voluntary safety standards have called for makers to supply the bracket since 1991. A range of any age may never have had it installed.
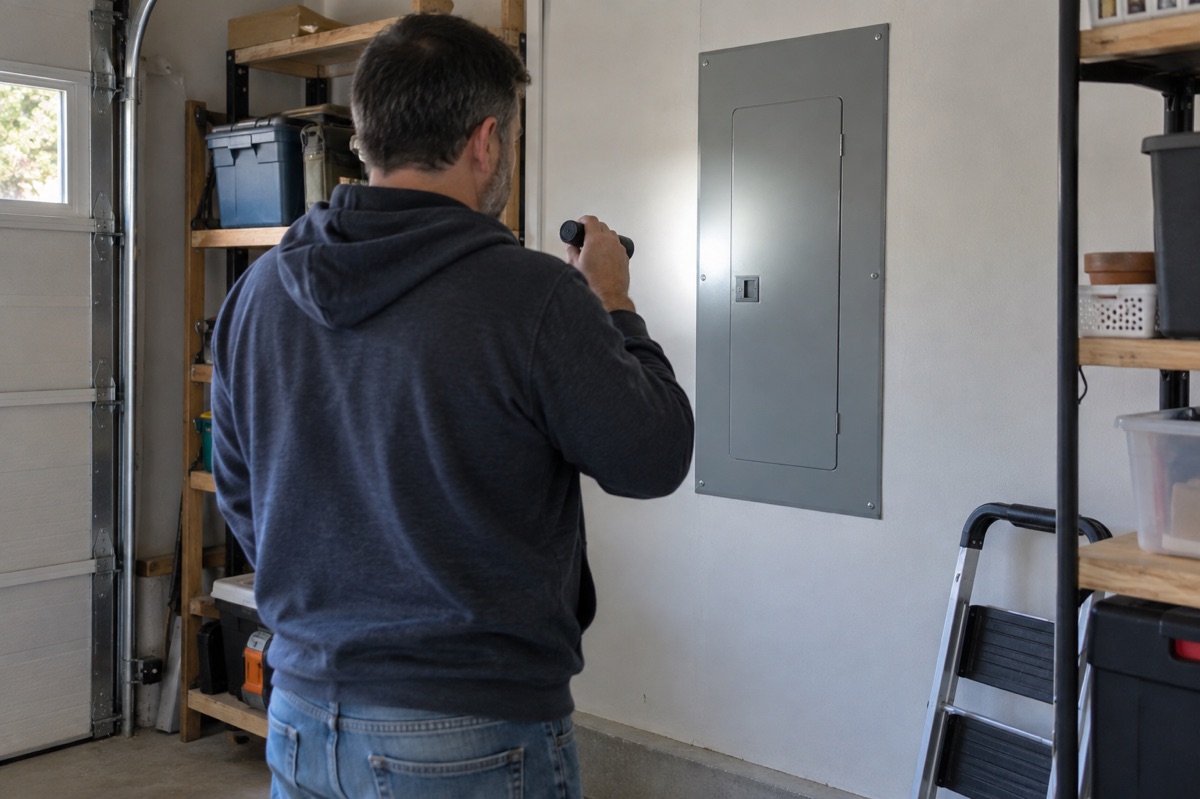
AI-generated illustration, not a photo of a real home.
Knob-and-tube wiring
Check firstBuilt 1950 or earlierSafetyInsuranceResale
Knob-and-tube is the oldest kind of home wiring, with single wires held on white ceramic knobs and tubes.
Stop: Do not touch, pull, or move the wires or knobs. Do not cover them with insulation. Do not open outlets, switches, or the panel. If you see loose, pebble-like gray-brown or silver-gold insulation, do not touch it or go farther. EPA says to assume this vermiculite has asbestos.
Ask your inspector: “Is any knob-and-tube wiring in this house still live, and which rooms does it feed?”
What to do about Knob-and-tube wiring
Safe first steps
Take photos from a distance and note where you saw it. Hold off on adding attic insulation. A U.S. Energy Department guide says to check for live knob-and-tube first. Ask a licensed electrician which circuits are still live. Get a written quote to replace them. If you are buying, get the quote before your inspection period ends. Call an insurance agent early, too.
Who to call
A licensed electrician to test the wiring and give a quote. A home inspector if you are buying. In Florida, a Florida-licensed inspector for the 4-point insurance inspection. Your insurance agent before you close or renew.
Ask your inspector
“Is any knob-and-tube wiring in this house still live, and which rooms does it feed?”
How to spot it
Look without touching. Shine a flashlight from the attic hatch or in an unfinished basement. Look for single wires run apart from each other. Small white ceramic knobs hold them off the wood. Where the wires pass through wood, they run through white ceramic tubes. The wires often have a dark cloth cover. Outlets with only two slots are another clue. Stay on safe footing. Do not move insulation to see better.
Why it matters
This wiring has no ground wire. Its old rubber insulation can get brittle and crack with age. It was built to cool off in open air. UL says bad splices (spots where wires join) can glow red-hot and go unnoticed. UL says insulation blown over this wiring can catch fire from those hot spots. Some insurers will not cover a home with live knob-and-tube.
Insurance note
Florida's Citizens requires a 4-point inspection when you apply to insure a home more than 20 years old. That is a check of the roof, wiring, plumbing, and heating and cooling. Its sample form asks the inspector to mark "Active knob and tube." Some insurers will not take a home with it. For example, a 2021 Farmers new-business guideline filed in Maine lists active knob and tube as ineligible. Rules differ by company and change over time, so ask your agent.
When this applies
InterNACHI says it was common from about 1880 to the 1940s. UL says it began to be phased out in the 1930s. We flag homes built through about 1950. Any older home that was never fully rewired can still have some.
Check firstBuilt 1970 or earlierSafetyInsuranceResale
This is older cable with a woven cloth cover. The wires inside often have rubber insulation.
Stop: Do not bend, pull, or staple old cloth-covered cable. Do not open outlets, switches, junction boxes, or the panel. Do not rewire anything yourself. In the attic, do not touch loose, pebble-like insulation (vermiculite). EPA says to assume it has asbestos.
Ask your inspector: “Is this cloth-covered cable the old rubber-insulated kind, and is it cracking anywhere you can see?”
What to do about Cloth-covered wiring (often rubber-insulated)
Safe first steps
Take photos from a distance. Ask a licensed electrician how much of the house still has this cable. Ask whether the insulation is cracking where it shows. Get a written quote for a partial or full rewire. If you are buying, talk to your insurance agent before closing.
Who to call
A licensed electrician. A home inspector if you are buying. In Florida, a Florida-licensed inspector for the 4-point insurance inspection. Your insurance agent.
Ask your inspector
“Is this cloth-covered cable the old rubber-insulated kind, and is it cracking anywhere you can see?”
How to spot it
Look from the attic hatch, or in an unfinished basement or garage, for cables stapled to the wood. Old cable has a woven cloth cover. It is often dark brown, black, or tan, and may look frayed. Newer cable has a smooth plastic jacket, often with printing on it. Only look. Do not bend or pull a cable to check it. Stay on safe footing. This is a different system from knob-and-tube.
Why it matters
UL says the old rubber insulation got brittle and cracked with age. UL also says most of this cable had no ground wire before the early 1960s. An electrician can tell what the wires inside are made of. Wear varies from house to house, so a pro has to judge it. Your insurer may ask about it on an older home.
Insurance note
Florida's Citizens requires a 4-point inspection when you apply to insure a home more than 20 years old. That is a check of the roof, wiring, plumbing, and heating and cooling. Its sample form asks the inspector to mark "Cloth wiring." It also lists a "Cloth Jacket Rubber Insulated" wiring type. The form says this information is used to decide insurability. Rules differ by insurer, so ask your agent.
When this applies
UL says wire makers began moving from rubber to plastic wire insulation in the 1950s. UL says plastic began replacing the cloth jacket in the early 1960s. By about 1970, most cable had a plastic jacket. A cloth braid was still allowed until 1984, so a few later homes may have some.
Check firstWent in about 1965–1979SafetyInsuranceResale
Some homes built from the mid-1960s through the 1970s used solid aluminum wire for everyday outlet and light circuits.
Stop: Do not remove outlet or switch covers. Do not do any repair yourself. CPSC says "DO NOT TRY TO DO IT YOURSELF." Do not accept twist-on connectors, or outlets and switches marked CO/ALR, as the final fix, even from an electrician. CPSC says these are only an emergency, temporary repair. CPSC also advises against other crimp connectors. In the attic, do not touch loose, pebble-like insulation.
Ask your inspector: “Is there single-strand aluminum branch wiring here, and was every connection repaired with COPALUM or AlumiConn by a licensed electrician?”
What to do about Aluminum branch-circuit wiring
Safe first steps
Know CPSC's warning signs: hot cover plates, flickering lights, dead circuits, or a burning-plastic smell. If you notice one, stop using that outlet or switch. Call a licensed electrician. If you see smoke or fire, get out and call 911. CPSC recognizes three permanent repairs. One is a full copper rewire. Another is COPALUM crimp connectors. The third is AlumiConn connectors, if COPALUM isn't available. Only electricians trained by the maker may install COPALUM. CPSC noted in 2011 that AlumiConn had less long-term history. Keep all repair paperwork.
Who to call
A licensed electrician who does aluminum wiring repairs. For COPALUM, CPSC says the electrician must be trained by the maker. In Florida, a Florida-licensed inspector for the 4-point insurance inspection. Your insurance agent, to confirm which repairs your insurer accepts.
Ask your inspector
“Is there single-strand aluminum branch wiring here, and was every connection repaired with COPALUM or AlumiConn by a licensed electrician?”
How to spot it
Where cables show in an unfinished basement or garage, or from the attic hatch, read the printing on the cable jacket. Don't touch it. A flashlight held at a low angle helps. Aluminum cable is marked "AL" or "ALUMINUM" every few feet. If it also says "CU-clad" or "copper-clad," it is a different wire. CPSC's repair advice does not cover that kind. Can't tell? Have an electrician check. Ask the seller for any repair paperwork.
Why it matters
CPSC says the fire risk is at the connections. That means outlets, switches, junction boxes, and hard-wired appliances. A survey done for CPSC looked at homes built before 1972. It compared aluminum-wired homes with copper-wired homes. Aluminum homes were 55 times more likely to have an outlet connection reach "fire hazard conditions." CPSC means very hot cover screws, sparks, or charring. CPSC says these connections can fail with no warning first.
Insurance note
Citizens' FAQ (updated April 16, 2026) accepts multi-strand aluminum wiring. It does not accept single-strand (solid) aluminum branch wiring, with two exceptions. One: the home was fully rewired with copper. Two: every aluminum-to-copper connection was repaired with COPALUM or AlumiConn. Citizens says no other repair method is acceptable. Its 4-point form requires repair paperwork certified by a licensed electrician. Other insurers set their own rules.
When this applies
CPSC says aluminum branch wiring went in from 1965 to about the mid-1970s. That includes new homes, additions, and new circuits. UL says it was popular through the 1970s. A home built before 1965 is unlikely to have it, unless it got an addition or new circuits in those years.
Check firstBuilt 1965 or earlierSafetyInsuranceResale
These are outlets with no ground wire behind them, common in homes built before the 1960s.
Stop: Do not replace outlets yourself. Do not let anyone put 3-prong outlets on a circuit with no ground unless GFCI protection and No Equipment Ground labels are added. Do not remove cover plates or open the panel.
Ask your inspector: “Which outlets in this house have no working ground, and how would you fix each one?”
What to do about Two-prong and ungrounded three-prong outlets
Safe first steps
Don't use 3-to-2 plug adapters ("cheater" plugs). Don't cut the round pin off a plug. Ask a licensed electrician about fixes. One is adding a ground wire. Another is GFCI protection (a shock-protection outlet or breaker) with "No Equipment Ground" labels. CPSC says a GFCI can replace an old two-slot outlet with that label. Use fewer extension cords and power strips.
Who to call
A licensed electrician. A home inspector if you are buying. In Florida, a Florida-licensed inspector for the 4-point insurance inspection.
Ask your inspector
“Which outlets in this house have no working ground, and how would you fix each one?”
How to spot it
Look for outlets with only two slots and no round hole. In older homes, 3-hole outlets are sometimes put in with no ground wire behind them. A plug-in outlet tester from a hardware store can hint that the ground is missing. Some unsafe setups can fool it, so have an electrician confirm. A GFCI outlet with a "No Equipment Ground" label is a fix CPSC describes for old two-slot outlets. It still has no ground wire.
Why it matters
A ground wire gives stray electricity a safe path. Without one, a fault in a metal-cased appliance is more likely to shock someone. Before 1959, the code called for fewer outlets per room (UL). That can mean more extension cords. Florida's Citizens inspection form has a box for improper grounding.
Insurance note
Florida's Citizens requires a 4-point inspection when you apply to insure a home more than 20 years old. Its sample form has a box for "Improper grounding" under hazards. The form does not say whether two-slot outlets count. It does say agents may not submit homes with electrical hazards. Other insurers vary, so ask your agent and inspector how they treat ungrounded outlets.
When this applies
UL says the 1962 national code first required a ground on every circuit. We flag homes built through about 1965 because towns adopted codes at different times. Some older outlets may be grounded: UL says laundries needed them from 1947, and basements, garages, and outdoor spots from 1956. Any older home can also have 3-hole outlets added later with no ground.
GFCIs are outlets or breakers that cut power fast to help prevent serious shocks near water. Older homes often lack them.
Stop: Do not swap outlets or breakers yourself. Do not open the panel. Do not keep using an outlet whose GFCI fails its test.
Ask your inspector: “Which wet-area outlets here lack GFCI protection, and did any fail the test button?”
What to do about Missing or untested GFCI shock protection
Safe first steps
Test each GFCI outlet at least once a month and after a power outage (CPSC). If the lamp doesn't go off, or won't come back on, stop using that outlet. Call an electrician. If you have GFCI breakers, ask an electrician to show you how to test them. Use a portable plug-in GFCI with outdoor power tools and yard equipment. Ask an electrician to add GFCI protection where it is missing.
Who to call
A licensed electrician. A home inspector can note missing GFCIs if you are buying.
Ask your inspector
“Which wet-area outlets here lack GFCI protection, and did any fail the test button?”
How to spot it
A GFCI outlet has TEST and RESET buttons. Some plain outlets are protected by a GFCI outlet elsewhere or by a GFCI breaker. They may have a "GFCI Protected" sticker. Check bathrooms, kitchen counters, garage, outdoor outlets, laundry, and unfinished basement. To test one, CPSC says plug in a lamp and turn it on. Press TEST. The lamp should go off. Press RESET. It should come back on.
Why it matters
CPSC says GFCIs are designed to protect people from severe or fatal shocks. CPSC points to places where electrical equipment is near water. It says GFCIs have played a key role in reducing electrocutions. CPSC says the code mostly applies to new homes and major remodels. So older homes often lack GFCIs in some spots.
When this applies
Every home should test its GFCIs each month (CPSC). Homes built before about 2008 are the most likely to be missing some. The national code added GFCI in steps (CPSC and UL): outdoor outlets 1973, bathrooms 1975, garages 1978, whirlpool tubs 1981, near kitchen sinks 1987, unfinished basements and crawl spaces 1990, wet bars 1993, all kitchen counters 1996, laundry and utility sinks 2005. Towns adopted each code at different times.
Good to knowBuilt 2020 or earlierSafetyGood to know
An AFCI (arc-fault circuit interrupter) cuts power when it senses sparking in wiring. Older homes have few or none.
Stop: Do not install or swap breakers yourself. CPSC says the panel is usually still live, even with the main breaker off. Do not open or remove the panel cover. Do not replace an AFCI with a regular breaker to stop trips.
Ask your inspector: “Which circuits in this house have AFCI protection, if any?”
What to do about Missing AFCI arc-fault fire protection
Safe first steps
Ask your electrician which circuits have AFCIs and how to test them safely. When you remodel, add circuits, or replace the panel, ask about AFCI protection. If an AFCI keeps tripping, call an electrician. Don't just keep resetting it.
Who to call
A licensed electrician.
Ask your inspector
“Which circuits in this house have AFCI protection, if any?”
How to spot it
Ask your electrician or home inspector which circuits have AFCI protection. You can also check permit records for when the house was wired or rewired. Let the pro look. Do not open or remove any panel cover to check.
Why it matters
CPSC says regular fuses and breakers do not respond to early arcing and sparking. By the time they trip, a fire may have started. CPSC says AFCIs can add protection against these wiring fires. It says older homes with ordinary breakers may especially benefit.
When this applies
No home needed AFCI before 2002. From 2002, the code required it for bedroom circuits only (UL). The 2008 code added most living areas. The 2014 code added kitchens and laundry areas. In Florida, the living-area rule took effect March 15, 2012. The kitchen and laundry rule took effect December 31, 2017. Some states adopted these rules later or changed them, so we flag homes built through about 2020.
Good to knowBuilt 2012 or earlierSafetyGood to know
Tamper-resistant (TR) outlets have built-in shutters that help keep kids from pushing objects into the slots.
Stop: Do not replace outlets yourself. Do not remove cover plates. Keep kids away from loose or damaged outlets until an electrician fixes them.
Ask your inspector: “Are the outlets in this home tamper-resistant?”
What to do about Outlets without child-safe shutters
Safe first steps
If young children live in or visit the home, ask an electrician to put in TR outlets. Start where kids play and sleep. NFPA says plug-in caps can get lost and can be a choking hazard. It also says kids can learn to open sliding covers.
Who to call
A licensed electrician.
Ask your inspector
“Are the outlets in this home tamper-resistant?”
How to spot it
Look closely at the slots. On a TR outlet, plastic shutters block the slots. You can't see straight in. You may also see the letters TR on the face. Older outlets have open slots.
Why it matters
NFPA says the shutters open only when both prongs of a plug push in together. So a child poking one slot does not reach the electricity. NFPA says about 1,800 children age 14 or under got ER care in 2006 for outlet shocks or burns.
When this applies
The 2008 national code first required tamper-resistant (TR) outlets in new and renovated homes (NFPA). States adopted it at different times. In Florida, the state code with this rule took effect March 15, 2012. An older home may have some TR outlets if outlets were replaced later.
Faulty lights, pumps, or wiring at a pool, spa, or hot tub can put electricity into the water.
Stop: Do not open, repair, or change pool lights, pumps, or wiring yourself. Do not jump in to help a shocked swimmer until the power is off. CPSC warns rescuers can be shocked too.
Ask your inspector: “Do the pool lights, pump, and outlets near the water have working GFCI protection?”
What to do about Pool, spa, and hot tub shock risk
Safe first steps
CPSC says to have an electrician qualified in pool and spa work inspect and upgrade it to code. Ask about GFCI protection for pool lights, pumps, and nearby outlets. Learn where the pool equipment switches and breakers are, so you can shut them off fast. If a swimmer feels a tingle, CPSC says move away from the source and get out. Avoid a metal ladder if you can. If someone is shocked, turn off all power, then call 911.
Who to call
A licensed electrician who does pool and spa work. Call 911 for any shock injury.
Ask your inspector
“Do the pool lights, pump, and outlets near the water have working GFCI protection?”
How to spot it
Look for GFCI outlets near the water, with TEST and RESET buttons. Test them with the TEST button. Note any cords or plug-in devices near the water. Ask when the pool lights and wiring were last inspected. CPSC lists warning signs in the water: tingling, muscle cramps, or a swimmer who can't move.
Why it matters
CPSC says wet skin and wet surfaces greatly raise the chance of electrocution. CPSC is most concerned about faulty underwater lights in older pools. It also names aging wiring that hasn't been inspected in years. Other hazards: sump pumps, power washers, and vacuums that are not grounded, and cords that fall into the water.
When this applies
Applies to any home with a pool, spa, or hot tub, whatever its age. Older pools may predate GFCI rules. UL says the code required GFCI for underwater pool lights in 1968 and for outlets near pools in 1971.
Outlets, wiring, and breakers that sat in flood water may be unsafe even after they dry out.
Stop: Do not touch wet electrical equipment or stand in water near it. Do not reset breakers or turn the power back on after a flood. Do not dry out and reuse outlets, GFCIs, or breakers.
Ask your inspector: “Has this home ever had flood water, and were the panel, breakers, outlets, and wiring replaced or checked by an electrician afterward?”
What to do about Wiring and outlets after a flood
Safe first steps
After a flood, keep the power off until an electrician checks the system. Ready.gov says don't touch electrical equipment if it is wet or you are standing in water. Stay away from downed power lines. If you are buying, ask which electrical parts were replaced after any flood. Ask to see permits for the work.
Who to call
A licensed electrician. Your electric utility for downed lines. Your insurance agent for claim questions.
Ask your inspector
“Has this home ever had flood water, and were the panel, breakers, outlets, and wiring replaced or checked by an electrician afterward?”
How to spot it
Ask the seller, or check your records, whether water ever reached outlets, wiring, or the panel. Look for water lines on walls, and rust or mud around outlets and the outside of the panel. Don't touch. Ask for repair records, permits, and past insurance claims.
Why it matters
NEMA is the trade group for electrical makers. It says wet equipment can be extremely hazardous if the power comes back on without a proper check. Its guide says to replace water-damaged breakers, fuses, GFCIs, AFCIs, outlets, and switches. It also says to replace wet cable made only for dry places, such as NM-B. The panel box itself may sometimes be reconditioned, but only with its maker's guidance. Salt water is especially damaging.
When this applies
Applies to any home that ever had flood water, storm surge, or a major leak reach outlets, wiring, or the panel. The home's age does not matter.
Check firstWent in about 1950–1990SafetyInsuranceResale
Federal Pacific Electric (FPE) made Stab-Lok breaker panels. Inspectors and some insurers flag these older panels.
Stop: Don't take off the panel's metal cover, pull out breakers, or flip them to test them. Don't touch a panel that is warm, buzzing, wet, scorched, or smells burnt. If you see smoke or fire, get out and call 911.
Ask your inspector: “Is the main panel or any subpanel an FPE Stab-Lok, and did you take off the cover to check for heat damage?”
What to do about Federal Pacific (FPE) Stab-Lok breaker panel
Safe first steps
Photograph the door label.
Test your smoke alarms.
Ask a licensed electrician to check the panel and quote a replacement.
Ask your insurance agent if the panel affects your policy.
If a breaker trips, don't just reset it. CPSC says to find out why first.
Don't switch these breakers off and on to test them. CPSC's general checklist says to do that once a year. But inspectors report this brand's breakers can stick. Let the electrician test them.
Who to call
A licensed electrician to check the panel and quote a replacement. Your insurance agent to ask about coverage.
Ask your inspector
“Is the main panel or any subpanel an FPE Stab-Lok, and did you take off the cover to check for heat damage?”
How to spot it
Find your breaker box. It is often in the garage, a utility room, or on an outside wall. First look without touching. If it is warm, wet, rusty, buzzing, or smells burnt, don't open it. Otherwise, open only the small hinged door, the one you use to reset a breaker. Don't unscrew anything. Read the door and the label inside it. Look for Federal Pacific Electric, FPE, Federal Electric, Federal Noark, or Stab-Lok. Take a clear photo of the label. Other companies also made breakers that fit these panels. So newer-looking breakers don't rule out an FPE panel. If the label is gone, let an electrician tell you the brand.
Why it matters
A breaker should shut off power when a circuit is overloaded. In 1983, the U.S. Consumer Product Safety Commission (CPSC) ended its study of these breakers. It said its tests found some failed certain UL tests. UL is a product safety testing group. CPSC also said its data did not show a serious risk. It closed the case partly because more testing would cost several million dollars. CPSC never decided whether the breakers are safe. There was no recall. Hanover, an insurer, says the safest choice is to replace the panel. Some Florida insurers' rules say homes with these panels don't qualify for a policy. So it can affect your insurance, your sale, and your budget.
Insurance note
Some Florida insurers' guides list FPE or Stab-Lok panels as ineligible. That means the home does not qualify for that policy. We found this in guides from Universal (2018), Anchor (2019), and Slide (January 2023, its Legacy Product). These guides may be out of date. Citizens' 4-point form asks for the panel brand and a photo of the door label. This form is an inspection report on a home's main systems. We found no Citizens rule that names FPE. Rules differ by company and change, so ask your agent.
When this applies
FPE panels went into homes from about 1950 to the mid-1980s. Hanover, an insurer, says 1950 to 1985. We show it through about 1990 because the end year is not exact. Older homes may have gotten one when the panel was upgraded.
Check firstWent in about 1950–1985SafetyInsuranceResale
Zinsco and GTE-Sylvania made older breaker panels. Inspectors often flag them, and some insurers won't accept them.
Stop: Don't take off the panel's metal cover, pull out breakers, or flip them to test them. Don't touch a panel that is warm, buzzing, wet, scorched, or smells burnt. If you see smoke or fire, get out and call 911.
Ask your inspector: “Is my panel a Zinsco or Sylvania, and did you see loose breakers or heat damage with the cover off?”
What to do about Zinsco or Sylvania breaker panel
Safe first steps
Photograph the door label.
Test your smoke alarms.
Have a licensed electrician check the panel and quote a replacement.
Ask your insurance agent if the panel affects your policy.
Don't switch these breakers off and on to test them. CPSC's general checklist says to do that once a year. But inspectors report a damaged Zinsco breaker can look off and still be on. Let the electrician test them.
Who to call
A licensed electrician to check the panel and quote a replacement. Your insurance agent to ask about coverage.
Ask your inspector
“Is my panel a Zinsco or Sylvania, and did you see loose breakers or heat damage with the cover off?”
How to spot it
First look without touching. If the box is warm, wet, rusty, buzzing, or smells burnt, don't open it. Otherwise, open only the small hinged door, the one you use to reset a breaker. Don't unscrew anything. Look on the door and label for Zinsco, Sylvania, GTE-Sylvania, or Magnatrip. Zinsco breakers often have colored handles. Take a photo of the label. Other companies made breakers that fit these panels. So new-looking breakers don't rule it out. If you're not sure, have an electrician confirm the brand.
Why it matters
Inspectors report that these breakers can work loose from the metal bar they plug into. That can cause sparks and heat. Then a breaker may not shut off power when it should. We found no government recall or official finding on these panels. Some Florida insurers' rules say homes with them don't qualify for a policy. That can affect your insurance, your sale, and your budget.
Insurance note
Some Florida insurers' guides list these panels as ineligible. That means the home does not qualify for that policy. We found this in guides from Universal (2018, Zinsco and Sylvania-Zinsco), Anchor (2019), and Slide (January 2023, its Legacy Product). These guides may be out of date. Citizens' 4-point form asks for the panel brand. This form is an inspection report on a home's main systems. Rules differ by company and change, so ask your agent.
When this applies
Zinsco breakers date from about 1950. GTE-Sylvania bought the line in 1973 and left the business in 1981. Panels already made could still go into homes for a few years. So we show it through about 1985. Most went into homes from about the 1950s to the 1970s. Older homes may have gotten one when the panel was upgraded. Later Challenger-brand panels are a separate item.
Plan forWent in about 1978–2008InsuranceResaleSafety
Challenger is an older panel brand. Some insurers flag it, but inspectors disagree about the risk.
Stop: Don't take off the panel's metal cover or pull out breakers. CPSC's steps for removing recalled breakers are for electricians. Don't touch a panel that is warm, buzzing, wet, scorched, or smells burnt. If you see smoke or fire, get out and call 911.
Ask your inspector: “Is my panel a Challenger, and are any breakers the recalled HAGF type or an FPE or Zinsco-style design?”
What to do about Challenger breaker panel
Safe first steps
Photograph the door label and any yellow test buttons.
Ask your insurance agent if the panel affects your policy.
Have a licensed electrician check it if your insurer asks, or if you see heat or scorch marks.
If you might have a recalled HAGF breaker, have an electrician confirm and replace it. CPSC says the company can't be reached at its old phone numbers.
Who to call
Your insurance agent first. A licensed electrician if your insurer asks, if you see heat or scorch marks, or if you may have a recalled HAGF breaker.
Ask your inspector
“Is my panel a Challenger, and are any breakers the recalled HAGF type or an FPE or Zinsco-style design?”
How to spot it
First look without touching. If the box is warm, wet, rusty, buzzing, or smells burnt, don't open it. CPSC says the Challenger name may be stamped on the panel's door handle. It may also be on the label inside the small door. Open only that small hinged door, the one you use to reset a breaker. Take a photo of the label. Also look for a breaker with a yellow button marked test. If its handle shows 15 or 20 in white between ON and OFF, it may be a recalled HAGF breaker.
Why it matters
Experts disagree about these panels. Some inspectors report Challenger breakers overheating where they plug in. A Minnesota inspection firm says Challenger panels are not a concern. Some Florida insurers' rules say homes with them don't qualify for a policy. That can affect insurance and resale. The only CPSC recall we found was narrow. In 1988 it covered HAGF-15 and HAGF-20 ground-fault breakers made February to April 1988. Ground-fault breakers help protect people from shock. A loose part inside could stop that protection. CPSC said normal overload protection still worked.
Insurance note
Some Florida insurers' guides list Challenger panels as ineligible. That means the home does not qualify for that policy. We found this in Anchor's 2019 guide and Slide's January 2023 Legacy Product guide. Universal's 2018 guide names only Challenger-Zinsco boxes. These guides may be out of date. Rules differ by company and change, so ask your agent.
When this applies
The Challenger name was used from about 1978. The brand was reportedly dropped about 2005. Panels already made could still be installed, so we show it through about 2008. Older homes may have gotten one when the panel was upgraded. The 1988 breaker recall in this item applies only to homes built or rewired since February 1988.
Plan forWent in about 1930–1985SafetyInsuranceResale
Pushmatic (also sold as Bulldog or ITE) is an old breaker panel that uses push buttons instead of flip switches.
Stop: Don't take off the panel's metal cover or force a stuck button. Don't keep pushing a breaker that won't reset. Don't touch a panel that is warm, buzzing, wet, or scorched.
Ask your inspector: “Is my panel a Pushmatic, and should an electrician check whether it needs to be replaced?”
What to do about Pushmatic push-button breaker panel
Safe first steps
Photograph the label and the push buttons.
Test your smoke alarms.
Have a licensed electrician look at it, especially before you add big appliances.
Ask your insurance agent if the panel matters to them.
Never trust a button to mean a circuit is off. Let an electrician test the breakers.
Who to call
A licensed electrician. Your insurance agent.
Ask your inspector
“Is my panel a Pushmatic, and should an electrician check whether it needs to be replaced?”
How to spot it
First look without touching. If the box is warm, wet, rusty, buzzing, or smells burnt, don't open it. Otherwise, open only the small hinged door. Pushmatic breakers are push buttons, not flip switches. You press them to turn a circuit off or on. The label may say Pushmatic, Bulldog, Bull Dog, or ITE. Take a photo of the label and the buttons.
Why it matters
Inspectors report these old breakers can get stiff or jam. One reported problem is a breaker that seems off but is still on inside. We found no recall or government finding on them. The panel's age alone may lead an insurer, inspector, or buyer to ask for an electrician's opinion.
Insurance note
Pushmatic is not named in the Florida carrier guides we read: Universal (2018), Anchor (2019), and Slide (January 2023). But one insurance program's application for condo and HOA buildings asks about ITE Pushmatic panels. So your insurer may ask too. Rules differ by company, so ask your agent.
When this applies
Most were installed from about 1950 to 1970. The line dates to about 1930 and changed owners into the mid-1980s, so a somewhat newer home can have one. Older homes may have gotten one when the panel was upgraded.
Check firstBuilt 1975 or earlierSafetyInsuranceResale
An older type of panel that uses screw-in or cartridge fuses instead of circuit breakers.
Stop: Never put in a bigger fuse, or a penny, foil, or wire, to stop a fuse from blowing. Don't take off the cover, pull out fuse blocks, or touch an empty fuse socket. Don't touch a box that is warm, wet, buzzing, or scorched.
Ask your inspector: “Does this home have any fuses, even in a subpanel, and are any fuses too big for the wires they protect?”
What to do about Fuse box instead of circuit breakers
Safe first steps
Photograph any fuses you can see without touching.
If you don't know the right sizes, have an electrician identify and label them, as CPSC suggests.
Ask the electrician about Type S fuse adapters. CPSC says these only accept the correct fuse size.
Ask the electrician about replacing the panel.
Ask your insurance agent if fuses affect your policy.
If a fuse blows, find out why before it is replaced.
Who to call
A licensed electrician. Your insurance agent.
Ask your inspector
“Does this home have any fuses, even in a subpanel, and are any fuses too big for the wires they protect?”
How to spot it
With a fuse box, a blown fuse must be replaced. It can't be switched back on like a breaker. Screw-in fuses look like the base of a light bulb, with a small window on top. Cartridge fuses are tubes held in pull-out blocks. Don't open the fuse box just to look. If the fuses are already in plain view, read the numbers without touching. Fuses for lights and outlets are usually 15, or 20 at most. CPSC says a bigger one there may mean someone swapped it. Main fuses and fuses for big appliances can be larger. So let an electrician judge the sizes. If you can't see the fuses, let an inspector or electrician read them.
Why it matters
Fuses protect wires only when they are the right size. CPSC warns that people sometimes put in a bigger fuse when one keeps blowing. A too-big fuse may not blow. Then the wires can overheat and start a fire. Some Florida insurers' rules say a home with fuses doesn't qualify for a policy. A fuse box can also mean small electrical service. See the 60-amp item.
Insurance note
Some Florida insurers' guides list homes with fuses as ineligible. That means the home does not qualify for that policy. We found this in guides from Universal (2018), Anchor (2019), and Slide (January 2023, its Legacy Product). These guides may be out of date. Citizens' 4-point form asks if the panel uses breakers or fuses. This form is an inspection report on a home's main systems. It lists blowing fuses and over-fusing as hazards. Over-fusing means a fuse too big for its wires. Rules differ by company, so ask your agent.
When this applies
Fuse boxes were common in homes built before about the 1960s. Florida inspectors say the switch to breakers was done by about the mid-1970s. Any older home can still have fuses, including in a second, smaller panel.
The home's main electrical service is small, often 60 amps, which may not meet today's needs or insurer rules.
Stop: Don't take off the panel cover or touch the meter or the wires coming into the house. If lights flicker in the wind, or you see sparks at those wires, stay away. Call the power company right away, as CPSC advises. If there is fire, get out and call 911.
Ask your inspector: “What is the amp rating of the main service, and is it enough for the home's appliances and air conditioning?”
What to do about Small electrical service (60 amps or less)
Safe first steps
Photograph the main breaker and the door label.
Before adding big appliances or an EV charger, ask an electrician for a load calculation. That is a check of how much power you need.
Ask your insurance agent about amp rules.
Get a quote for a service upgrade. Ask what it involves, such as a permit or work by the power company.
Who to call
A licensed electrician for the load check and upgrade. Your power company for problems at the meter or incoming wires. Your insurance agent.
Ask your inspector
“What is the amp rating of the main service, and is it enough for the home's appliances and air conditioning?”
How to spot it
Amps measure how much power the home can draw at once. First look without touching. If the panel is warm, wet, rusty, buzzing, or smells burnt, don't open it. Otherwise, with a breaker panel, open only the small hinged door. Find the main breaker. It is usually the largest one, often at the top. Look for its number: 60, 100, 150, or 200. The label inside the door may list it too. If you have a fuse box, don't open it. CPSC links a panel with just four screw-in fuses to 60-amp service. The main breaker's number is only a clue. An electrician can confirm your true service size.
Why it matters
Small service may not keep up with today's appliances. Adding central air, an electric range, or an EV charger may need an upgrade. Some insurers require at least 100 amps. Florida's Citizens does for new policies. If a buyer uses an FHA loan, the appraiser must report if the amps and panel size look too small. The appraiser must also tell the lender. That may add steps before the loan can close.
Insurance note
Citizens (Florida): new policies and rewrites need at least 100 amps. Policies in effect before 9/1/2012 can keep 60 amps. Its 4-point form asks for total amps and whether they are enough for current use. This form is an inspection report on a home's main systems. Universal's 2018 guide and Anchor's 2019 guide also call for at least 100 amps. Rules differ by company and change, so ask your agent.
When this applies
60-amp service was common in homes built before about 1960. One inspector says 100 amps became standard for new homes starting in the 1960s. The change was gradual, so we show it through about 1975, like the fuse-box item. Any older home can still have it if the service was never upgraded.
In 2022, about 1.4 million Square D QO Plug-On Neutral breaker panels were recalled because they can overheat.
Stop: Don't take off the panel cover to hunt for the date code. Don't tighten screws or touch anything inside the panel. Don't touch a panel that is warm, buzzing, or smells burnt. If you see smoke or fire, get out and call 911.
Ask your inspector: “Is the panel a Square D QO Plug-On Neutral with a date code from 194871 to 221343, and was the free recall inspection done?”
What to do about Recalled Square D QO Plug-On Neutral panel
Safe first steps
If you have a Square D QO panel put in during 2020 or later, contact Schneider Electric. Call 1-888-778-2733, option 8, or visit se.com/us/qoloadcenter-safetyrecallnotice. They set up a free inspection by a trained electrician.
Keep working smoke alarms while you wait, as CPSC advises.
Keep the inspection paperwork for your insurer and for when you sell.
Who to call
Schneider Electric's recall line: 1-888-778-2733, option 8, weekdays 8 a.m. to 8 p.m. ET. A licensed electrician for anything else.
Ask your inspector
“Is the panel a Square D QO Plug-On Neutral with a date code from 194871 to 221343, and was the free recall inspection done?”
How to spot it
Look for a gray Square D panel with QO on the label. The recall covers QO Plug-On Neutral panels. First look without touching. If the box is warm, buzzing, or smells burnt, don't open it. Otherwise, open only the small hinged door. Schneider Electric, the maker, says the date code is on the label inside the door. Recalled codes run from 194871 to 221343. CPSC says codes on indoor panels may be hidden from owners. If you can't find a code, don't open anything else. Call Schneider or an electrician.
Why it matters
In June 2022, Schneider Electric recalled these panels, working with CPSC. CPSC says the panel can overheat and cause burns or a fire. Schneider says a wire screw inside may not have been tightened enough. CPSC listed one report of a loose wire and no injuries. The inspection and any repair or replacement are free.
Insurance note
Slide's January 2023 Florida Legacy Product guide lists breaker boxes under a recall as ineligible. That means the home does not qualify for that policy. We don't know if a finished recall inspection meets that rule. Your insurer may ask, so keep the paperwork and ask your agent.
When this applies
Recalled panels were made from about December 2019 to March 2022. The maker says panels installed before 2020 are not affected. Installs may have run into about 2023. An older home can have one if its panel was replaced in 2020 or later.
Recalled Siemens or Murray breakers and panels (2010)
Check firstWent in about 2010–2012Safety
In 2010, about 2.2 million Siemens and Murray breakers, panels, and meter combos were recalled. The reason was a fire hazard.
Stop: Don't take off the panel cover or pull out breakers to read the date codes. That is a job for an electrician. Don't touch a panel that is warm, buzzing, or smells burnt. If you see smoke or fire, get out and call 911.
Ask your inspector: “Is the panel a Siemens or Murray from about 2010, and could any breakers or the box carry the recalled date codes?”
What to do about Recalled Siemens or Murray breakers and panels (2010)
Safe first steps
If your home was built or rewired from mid-2010 to about 2012 and has a Siemens or Murray panel, ask an electrician to check the date codes.
CPSC told owners to contact Siemens for a free inspection and replacement. The number it listed was 800-756-6996. Ask Siemens if the offer still stands.
Test your smoke alarms.
Who to call
A licensed electrician. Siemens about the recall.
Ask your inspector
“Is the panel a Siemens or Murray from about 2010, and could any breakers or the box carry the recalled date codes?”
How to spot it
First look without touching. If the box is warm, buzzing, or smells burnt, don't open it. Otherwise, open only the small hinged door. Read the brand on the label. Look for Siemens or Murray. CPSC says breaker date codes 0610 or 0710 are on a label on the side of each breaker. Panel date codes are stamped inside the metal box. You can't see these safely yourself. An electrician has to check them. Take a photo of the door label.
Why it matters
CPSC says a spring clip in these products can break. The connection can then get too hot and spark. That can damage the panel and start a fire. The recall covered 15- to 50-amp breakers, panels, and meter combos. A meter combo is a panel joined to the electric meter box. CPSC listed one broken clip and no injuries.
Insurance note
One Florida insurer's guide (Slide, January 2023, its Legacy Product) lists breaker boxes under a recall as ineligible. That means the home does not qualify for that policy. Keep proof of any recall inspection or fix, and ask your agent.
When this applies
The recalled products were sold June to August 2010. We show it for homes built about 2010 to 2012 to allow for later installs. An older home can have them if breakers or the panel were replaced then.
In 2004, about 700,000 Square D arc-fault (AFCI) breakers were recalled because they may not detect sparking in wiring.
Stop: Don't pull out or swap breakers yourself. Don't take off the panel cover.
Ask your inspector: “Are there any Square D AFCI breakers with blue test buttons and red CN to JN date codes from the 2004 recall?”
What to do about Recalled Square D arc-fault breakers (2004)
Safe first steps
If you see Square D AFCI breakers with blue test buttons, take a photo.
Call Square D customer care at 888-778-2733. Ask if the free replacement still applies.
Have a licensed electrician confirm and replace any recalled breakers.
Test your AFCIs with their test buttons. CPSC's checklist says to test them monthly. A passing test does not show a breaker is outside the recall.
Who to call
A licensed electrician. Square D (Schneider Electric) customer care about the recall.
Ask your inspector
“Are there any Square D AFCI breakers with blue test buttons and red CN to JN date codes from the 2004 recall?”
How to spot it
Arc-fault breakers (AFCIs) help prevent fires from damaged wiring. These recalled ones were used on bedroom circuits. First look without touching. If the box is warm, buzzing, or smells burnt, don't open it. Otherwise, open only the small hinged door of a Square D panel. Look for QO or Homeline breakers with a blue test button. Read the label on the front of the breaker. CPSC's recall list includes QO115AFI, QO120AFI, HOM115AFI, and HOM120AFI. It also lists similar numbers with extra letters, like QOB115AFI or QO115AFIC. Take a photo. The red date code (CN through JN) is near the wire screw. You usually can't see it with the cover on. Let an electrician check it.
Why it matters
CPSC says a part inside could fail. Then the breaker may not detect an arc, which is sparking in damaged wiring. Arcs can start fires. CPSC says the breaker would still work as a regular breaker. So the lost protection is easy to miss.
When this applies
The recalled breakers were made after March 1, 2004 and sold March to September 2004. We show it for homes built about 2004 to 2006 to allow for later installs. An older home can have them if its bedroom circuits were updated then.
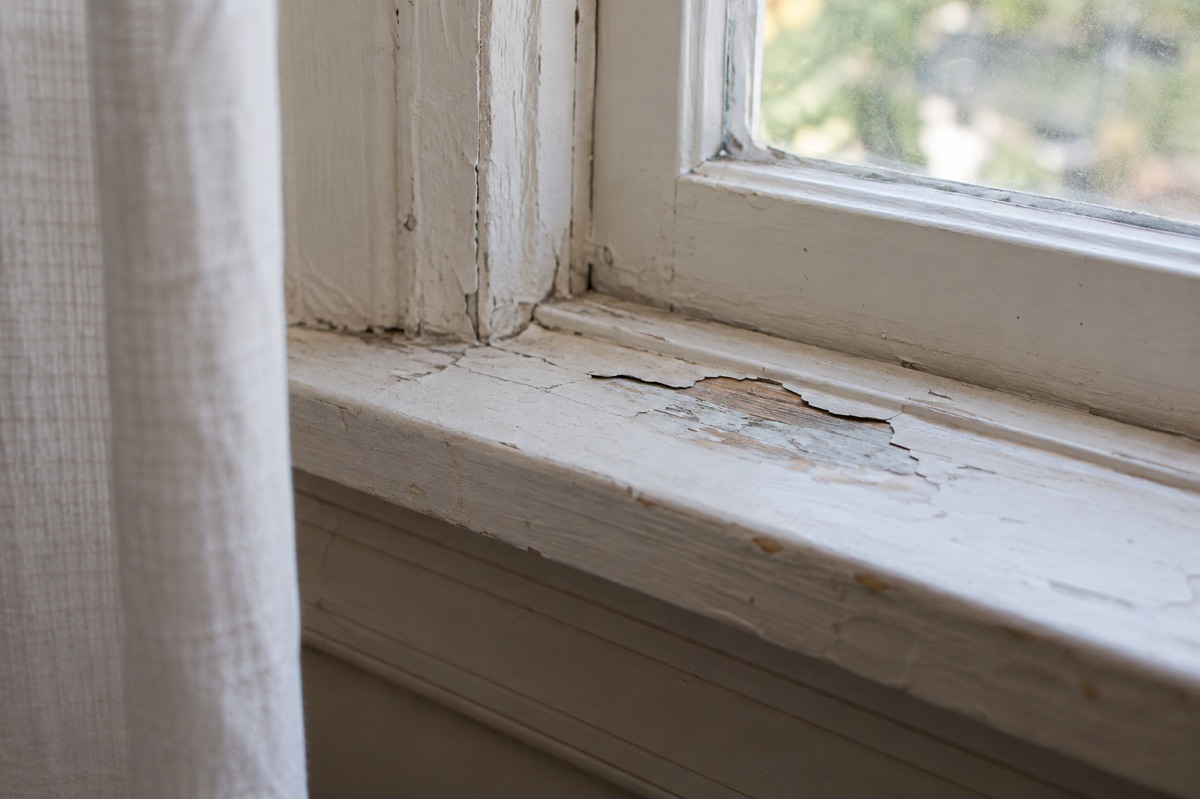
AI-generated illustration, not a photo of a real home.
Lead paint in older homes
Check firstBuilt 1978 or earlierHealthSafety
Homes built before 1978 may have lead paint, which can turn into toxic dust.
Stop: Don't sand, scrape, dry-sweep, or heat old paint. Don't try to remove lead paint yourself. Painting over it is not a lasting fix. Don't count on a store test kit to prove a home is safe.
Ask your inspector: “Are you EPA- or state-certified, and will you test paint, dust, and bare soil?”
What to do about Lead paint in older homes
Safe first steps
Treat old paint as lead until a test says it isn't. EPA calls this the simplest and safest approach. Wet-clean floors, window sills, and window frames every week. Pick up paint chips right away without making dust. Wash kids' hands, bottles, and toys often. Ask your child's doctor about a blood lead test. To know for sure, hire a certified inspector or risk assessor. A risk assessment also checks dust and bare soil. A permanent fix is called abatement. It removes the lead paint, or seals or covers it with special materials. Afterward, cleanup goes on until a dust test, called clearance, passes.
Who to call
A certified lead inspector or risk assessor. Use EPA's Lead-Based Paint Professional Locator, or call 1-800-424-LEAD (5323). In Florida, EPA does the certifying. For a permanent fix, hire a certified lead abatement contractor. If a child may be exposed, call the child's doctor.
Ask your inspector
“Are you EPA- or state-certified, and will you test paint, dust, and bare soil?”
How to spot it
You can't see lead in paint. The build year is the biggest clue. EPA estimates 87% of homes built before 1940 have some. For homes built 1960 to 1978, EPA's estimate is 24%. Look for peeling, chipping, chalking, or cracking paint. Check spots that rub or bump, like windows, doors, stairs, and porches. Chew marks on sills or railings are a warning sign. A child may be eating paint. Only a certified lead inspector or risk assessor can tell you for sure. Both are trained lead testers.
Why it matters
Lead is a poison. Children under 6 and unborn babies are most at risk. In kids, it can cause learning, speech, and behavior problems. No safe blood lead level has been found. Paint in good shape is usually not a hazard. But paint that rubs or gets bumped, like on windows, can still make dust. So can worn or damaged paint. Scraping, sanding, or heating paint makes dust too. You often can't see this dust.
When this applies
Most likely in homes built before about 1978, when lead paint for homes was banned. A home built in 1978 could still have some older paint. Newer homes are unlikely to have it.
Lead disclosure when selling or renting a pre-1978 home
Plan forBuilt 1977 or earlierResaleGood to know
Sellers and landlords of homes built before 1978 must share what they know about lead paint.
Stop: Don't hide or leave out known lead reports. Don't dry-scrape or sand peeling paint yourself to get ready to sell.
Ask your inspector: “Can you finish a lead paint inspection or risk assessment within my 10-day contract window?”
What to do about Lead disclosure when selling or renting a pre-1978 home
Safe first steps
Sellers and landlords: gather any lead reports you have. Fill out the form honestly. If you know of no lead, you can say so. Keep signed copies for 3 years. Buyers: decide whether to use the 10-day window. Selling to an FHA buyer? Get peeling paint fixed early by a Lead-Safe Certified firm. For small spots, FHA accepts scraping and repainting by that firm. No repair is needed if a certified inspector finds the paint isn't lead.
Who to call
Your real estate agent or a real estate attorney for the forms. A certified lead inspector or risk assessor for a buyer's check. An EPA Lead-Safe Certified firm for paint repairs.
Ask your inspector
“Can you finish a lead paint inspection or risk assessment within my 10-day contract window?”
How to spot it
It applies when a home built before 1978 is sold or rented. The contract or lease should include a Lead Warning Statement. It should also have a signed lead disclosure form. The buyer or renter should get EPA's lead booklet. It's called Protect Your Family From Lead in Your Home. Buyers get a 10-day window to check for lead. Both sides can agree in writing to change it. Buyers can also waive it in writing.
Why it matters
Before a deal is signed, sellers and landlords must share known lead facts. They must also hand over any lead reports. The rule does not make them test or remove lead paint. Breaking the rule can bring federal penalties. Knowingly breaking it can also mean paying the buyer or renter three times their damages. FHA loans add a step. The appraiser must note chipped or peeling paint on a pre-1978 home. Then the appraiser must require a repair.
When this applies
The federal rule covers homes built before 1978 when they are sold or rented. Some cases are exempt. Examples are foreclosure sales and short rentals that can't be renewed. Studios and senior or disability housing are exempt too, unless a child under 6 lives or will live there.
Remodeling a pre-1978 home: use Lead-Safe Certified pros
Plan forBuilt 1977 or earlierHealth
In homes built before 1978, most paid work that disturbs paint must follow EPA lead-safe rules.
Stop: Don't sand, scrape, burn, or heat old paint yourself. Don't dry-sweep paint dust. If a crew uses a torch, or sands without a dust-catching vacuum, tell them to stop. Then call EPA's lead hotline at 1-800-424-LEAD (5323).
Ask your inspector: “Is your firm Lead-Safe Certified, and who is the certified renovator assigned to my job?”
What to do about Remodeling a pre-1978 home: use Lead-Safe Certified pros
Safe first steps
Hire only a Lead-Safe Certified firm. Ask who the certified renovator on your job is. Keep kids, pregnant people, and pets away from the work area. Expect daily cleanup and a cleanup check at the end. Want proof the area is clean? Write a lead-dust test by a lead pro into your contract. Thinking of doing it yourself? Call 1-800-424-LEAD (5323) for advice first.
Who to call
An EPA Lead-Safe Certified renovation firm. Use EPA's contractor locator or call 1-800-424-LEAD (5323). Some states run their own program. In Florida, EPA runs it. For a permanent fix, hire a certified lead abatement contractor.
Ask your inspector
“Is your firm Lead-Safe Certified, and who is the certified renovator assigned to my job?”
How to spot it
Think about any painting, window, or remodeling job. The rule covers disturbing more than 6 square feet of paint per room inside. Outside, the line is 20 square feet. Any window replacement or demolition of painted parts counts too. Jobs in the same room within 30 days count as one job. The rule doesn't apply if a certified pro tests the paint and finds no lead. Ask to see the firm's Lead-Safe Certified certificate. Before work starts, they must give you EPA's Renovate Right booklet. On the job, look for plastic sheeting, tape, and warning signs.
Why it matters
Sanding, scraping, or tearing out old painted parts can spread lead dust. The rule makes certified firms contain the dust and clean up well. It usually doesn't cover owners working on their own home. It does cover owners who rent out all or part of their home. It also covers home child care and house flippers.
When this applies
The rule covers homes built before 1978. It applies when paid work disturbs painted surfaces.
Bare dirt next to an older home can hold lead from old outside paint.
Stop: Keep kids from playing in bare dirt along the foundation. Don't dig, till, or plant food there until it's tested.
Ask your inspector: “Will your risk assessment test the bare soil in the play area and along the house walls?”
What to do about Lead in bare soil around an older home
Safe first steps
Cover bare dirt with grass, thick mulch, or clean soil. This is a short-term fix. Check covered spots often. Take off or wipe shoes at the door. Wash hands after yard work and outdoor play. EPA says to grow food at least 10 feet from buildings, roads, and driveways. Or use raised beds with clean soil. Test soil before you grow food in it.
Who to call
A certified lead risk assessor, who can sample bare soil. Your local health department can also give advice.
Ask your inspector
“Will your risk assessment test the bare soil in the play area and along the house walls?”
How to spot it
Look for bare dirt right next to the house and under porches. Check where kids play and where you grow food. Old paint chips in the dirt are a warning sign. You can't see lead in soil. Only a test can tell. Soil near busy roads or industrial sites can also have lead.
Why it matters
Kids can swallow lead when they play in bare dirt. People also track it inside on their shoes. In play areas, EPA calls bare soil a hazard at 400 ppm. That means parts per million. For the rest of the yard, the line is a 1,200 ppm average.
When this applies
Most likely around homes built before about 1978 with painted siding or trim. Soil near busy roads or industrial sites can have lead at any home age.
Check firstBuilt 2000 or earlierHealthResaleGood to know
Asbestos is a mineral fiber once mixed into many building materials. It is mainly a danger when damaged or disturbed.
Stop: Do not sand, scrape, saw, drill, break, remove, or take your own samples of anything that might contain asbestos.
Ask your inspector: “Did you see any materials that could contain asbestos, are any of them damaged, and what should be tested before we remodel?”
What to do about Asbestos in older homes: the basics
Safe first steps
If it is in good shape, leave it alone. Keep people and pets away from damaged spots. If bits are on the floor, don't sweep or vacuum them. Before any job that cuts into old materials, have a trained inspector take samples. Federal law does not require this training for work in detached single-family homes. But some states and cities do. In Florida, testing must be done by or under a state-licensed asbestos consultant. Use one company to test and a different one to remove. That way no one profits from telling you to remove it.
Who to call
A trained asbestos inspector or consultant to test. A licensed asbestos abatement contractor (a company trained to repair or remove asbestos) for repair or removal. In Florida, asbestos consultants and contractors must be licensed by the Department of Business and Professional Regulation (DBPR). Inspectors must work under a licensed consultant. Check the license before you hire.
Ask your inspector
“Did you see any materials that could contain asbestos, are any of them damaged, and what should be tested before we remodel?”
How to spot it
You can't tell by looking. Only a lab test can say for sure. It can hide in popcorn ceilings, old floor tiles and their glue, pipe wrap, cement siding, and attic insulation. Start with your build year and any big remodel years. Then look for damage without touching. Watch for crumbling, cracks, water stains, or bits on the floor.
Why it matters
Breathing asbestos fibers can cause lung cancer. It can also cause mesothelioma. That is a rare cancer of the chest or belly lining. Signs of these illnesses usually don't show up until about 20 to 30 years later. EPA says material in good shape is not likely a health risk if left alone. The risk comes when it is sanded, cut, drilled, torn out, or storm-damaged. That is why it matters most before a remodel, repair, or flip.
When this applies
Most likely in homes built or remodeled before about 1980. Illinois EPA says asbestos was still used now and then until the late 1980s. EPA, the federal environmental agency, has records of some asbestos products still sold in 1992. A federal minerals report says most U.S. asbestos used in 2000 went into roofing products. Go by when each material went in, not only the build year.
Bumpy, sprayed-on ceiling texture can contain asbestos. So can some older ceiling tiles.
Stop: Do not scrape, sand, wet-scrape, drill, or poke a popcorn ceiling or old ceiling tiles until tested. Do not sweep or vacuum fallen bits.
Ask your inspector: “Has this ceiling texture or tile been tested for asbestos, and if not, where should samples be taken?”
What to do about Popcorn ceilings and old ceiling tiles
Safe first steps
If it is not damaged, leave it alone. Before scraping, sanding, or drilling for lights or fans, have a trained inspector take samples. Ask for samples from each area where the texture looks different. If it is wet, sagging, or flaking, keep people out of that room. Get the leak fixed, then call an asbestos pro. The federal product-safety agency (CPSC) says sealing or covering asbestos is a job for trained pros.
Who to call
A trained asbestos inspector to take samples. A licensed asbestos abatement contractor (a company trained to repair or remove asbestos) to seal, cover, or remove it. In Florida, testing must be done by or under a state-licensed asbestos consultant. Removal needs a state-licensed asbestos contractor, with a few exceptions.
Ask your inspector
“Has this ceiling texture or tile been tested for asbestos, and if not, where should samples be taken?”
How to spot it
Look up. A bumpy, cottage-cheese texture is the classic sign. Rough sprayed or troweled texture on walls counts too. Some old ceiling tiles can also contain asbestos, whether glued on or in a drop ceiling. Look for water stains, peeling, sagging, or crumbly spots. Do not poke or scrape it to check.
Why it matters
Sprayed texture can be crumbly. Water leaks and shaking from heating or AC units can loosen it. Scraping, sanding, or drilling can put fibers in the air. Some people scrape off popcorn ceilings themselves. If the texture has asbestos, that job can put fibers in the air. Testing and pro removal can add cost to a remodel or flip.
When this applies
Most likely if the texture or tiles went on before about 1980. OSHA, the federal worker-safety agency, treats sprayed-on ceiling texture in buildings built through 1980 as asbestos until tested. EPA, the federal environmental agency, restricted spray-on asbestos again in 1990. Illinois EPA says use went on now and then until the late 1980s. So test 1980s texture too. Go by when the ceiling was done.
Wall joint compound, wall texture, and old plaster
Plan forBuilt 1980 or earlierHealth
The patching compound on drywall seams, some wall textures, and old plaster can contain asbestos.
Stop: Do not sand, grind, cut, or tear out these walls or ceilings until they have been tested.
Ask your inspector: “Before we open up these walls, can the joint compound, wall texture, and plaster be tested for asbestos?”
What to do about Wall joint compound, wall texture, and old plaster
Safe first steps
Leave walls in good shape alone. Before demo, sanding, or cutting new openings, get samples taken. Ask a trained inspector to test the joint compound, texture, and plaster. Share the results with your contractor before work starts. Plan the job around the results.
Who to call
A trained asbestos inspector to take samples. A licensed asbestos abatement contractor (a company trained to repair or remove asbestos) if it tests positive and must be disturbed. In Florida, testing must be done by or under a state-licensed asbestos consultant. Removal needs a state-licensed asbestos contractor, with a few exceptions.
Ask your inspector
“Before we open up these walls, can the joint compound, wall texture, and plaster be tested for asbestos?”
How to spot it
You can't see it. Drywall seams and patches, textured walls, and old plaster all look normal. What matters is when the walls were finished. It also matters whether you plan to sand, cut, or tear them out.
Why it matters
Sanding joint compound or tearing out walls makes lots of fine dust. If the compound, texture, or plaster has asbestos, that dust can carry fibers through the house. Kitchen and bath remodels, and flips that open walls, can stir it up.
When this applies
Most likely in walls finished before about mid-1978. CPSC, the federal product-safety agency, banned asbestos patching compounds. The ban took full effect in June 1978. OSHA, the federal worker-safety agency, treats troweled-on wall texture in buildings built through 1980 as asbestos until tested. Old plaster can contain asbestos too. Sources give no end year for it.
Old vinyl and asphalt floor tiles can contain asbestos. So can old sheet-vinyl backing and the glue under tiles.
Stop: Do not sand, grind, scrape, chip, or level old tile, sheet-vinyl backing, or tile glue. Do not use a power stripper or scrub pads on it.
Ask your inspector: “Can the floor tile and the glue under it be tested for asbestos, including any older layers under this floor?”
What to do about Old floor tiles, sheet vinyl, and tile glue
Safe first steps
If the tiles are intact, the safest choice is often to lay new flooring right over them. New Jersey's health department says that is safer, easier, and cheaper than removal. Don't strip old wax with scrub pads or power strippers. Before removing any old floor, have the tile and the glue tested.
Who to call
A trained asbestos inspector to sample the tile and glue. A licensed asbestos abatement contractor (a company trained to repair or remove asbestos) to remove it. In Florida, some intact flooring can be removed without an asbestos license. But strict state conditions apply. They include written notice to the state at least 3 days ahead. Ask any contractor to show how they meet them.
Ask your inspector
“Can the floor tile and the glue under it be tested for asbestos, including any older layers under this floor?”
How to spot it
Check kitchens, basements, and closets. Old tile may also hide under carpet or newer floors. Don't lift flooring to look. Square tiles 9 by 9 inches are a classic warning sign. Most of them contain asbestos. Some tiles of other sizes, like 12 by 12, do too. The glue underneath, called mastic, can also contain it. So can the backing on old sheet vinyl and some floor-leveling compound. Size is a clue, not proof.
Why it matters
Tiles in good shape hold fibers tightly. Sanding, grinding, chipping, or dry-scraping tile, glue, or backing can release them. Pulling up old floors for a remodel or flip can do this. So test the old layers before you tear out.
When this applies
Most likely in flooring put in before about 1980. OSHA, the federal worker-safety agency, treats vinyl and asphalt flooring installed through 1980 as asbestos until tested. A flooring trade group told EPA, the federal environmental agency, that its members stopped by the mid-1980s. But EPA found asbestos vinyl tile was imported in 1989 and 1990. Old tile can hide under newer floors, so go by when each layer went in.
Vermiculite is loose, pebble-like attic insulation. EPA says to assume it contains asbestos.
Stop: Do not remove, vacuum, move, or sample vermiculite yourself. If the Trust needs a sample, have a trained asbestos pro collect it.
Ask your inspector: “Did you see vermiculite in the attic or walls, even under newer insulation, and would our planned work disturb it?”
What to do about Vermiculite attic insulation (often Zonolite)
Safe first steps
Leave it alone. Don't store boxes in that attic. Don't let children play there. Tell any contractor before they go up. Planning removal? Contact the Zonolite Attic Insulation Trust at zaitrust.com first. It is a court-approved settlement trust, not a government program. It repays part of the cost to remove or contain it. Only Zonolite brand qualifies. It needs photos before removal, after removal, and after new insulation. It says payments are expected to go down. You don't need a paid claim service.
Who to call
A licensed asbestos abatement contractor (a company trained to repair or remove asbestos) to remove or contain it. In Florida, removal needs a state-licensed asbestos contractor, with a few exceptions. The Zonolite Attic Insulation Trust about possible partial repayment.
Ask your inspector
“Did you see vermiculite in the attic or walls, even under newer insulation, and would our planned work disturb it?”
How to spot it
Shine a flashlight from the attic hatch. Don't climb in or dig. Vermiculite is loose, pebble-like, pour-in insulation. It is usually gray-brown or silver-gold, with shiny flakes. It may hide under newer fluffy insulation. It can also be inside walls. But EPA says not to open walls to check.
Why it matters
EPA says to assume vermiculite contains asbestos and not to disturb it. It is loose and easy to stir into the air. Attic trips, wiring or AC work, recessed lights, and new insulation can all disturb it. EPA also says tests can give wrong results. EPA says to hire a professional asbestos contractor before work that would disturb it. Buyers may ask about it.
When this applies
EPA, the federal environmental agency, says a mine near Libby, Montana, supplied over 70 percent of U.S. vermiculite from 1919 to 1990. EPA says it was often sold under the name Zonolite. Attics are often topped up years later, so go by when the insulation went in.
Good to knowWent in about 1970–1983HealthResaleGood to know
UFFI is a foam insulation pumped into walls, often in the 1970s. It gave off formaldehyde gas when new.
Stop: Do not open walls, dig out foam, or take off outlet covers or switch plates to look for it.
Ask your inspector: “Do you see signs of urea-formaldehyde foam insulation, like rows of patched holes, and any sign of water getting into those walls?”
What to do about Urea-formaldehyde foam insulation (UFFI)
Safe first steps
In 1982, the federal product-safety agency (CPSC) advised no action if no one has symptoms. If someone has ongoing eye, nose, or breathing problems, see a doctor. Think about an indoor formaldehyde test. Fix any water getting into the walls. Have a specialist remove wet or crumbling foam. A Canadian housing agency said in 2006 that new carpet and wood products like particleboard were likelier formaldehyde sources.
Who to call
A home inspector to look for signs. An indoor air quality pro for a formaldehyde test. A doctor for symptoms. An insulation or remediation contractor if the foam is wet or breaking down.
Ask your inspector
“Do you see signs of urea-formaldehyde foam insulation, like rows of patched holes, and any sign of water getting into those walls?”
How to spot it
Look for a row of small patched holes, evenly spaced on outside or inside walls. They are about 1/2 to 3/4 inch across. Foam may also show where basement floor joists meet outside walls. These signs don't prove UFFI is there. A home inspector may be able to tell. Don't take off outlet covers or open walls to look.
Why it matters
UFFI gave off formaldehyde gas when new. Formaldehyde can irritate eyes, nose, and throat. EPA says it may cause cancer in humans. But EPA also says UFFI gives off less over time. Homes where it went in many years ago are unlikely to have high levels now. Foam that gets wet can break down and should come out. Buyers may still ask about it.
When this applies
EPA, the federal environmental agency, says many homeowners had UFFI put into their walls in the 1970s. So a much older home can have it. CPSC, the federal product-safety agency, banned it for homes in 1982. A federal court struck down that ban in 1983. Homes built after about the early 1980s are unlikely to have it.
AI-generated illustration, not a photo of a real home.
Lead water service line
Check firstBuilt 1988 or earlierHealth
Some older homes get their water through a lead pipe that runs from the street.
Stop: Don't scratch, cut, bend, or hammer a pipe that may be lead. Don't replace any part of it yourself. Leave any wires clamped to the pipe alone. Boiling water does not remove lead.
Ask your inspector: “Where the water line enters the house, what is the pipe made of, and could it be lead?”
What to do about Lead water service line
Safe first steps
Look up your address or call your utility. Ask about testing and help with replacement. Until it's replaced, use only cold water for drinking, cooking, and baby formula. Run the tap before drinking water that has been sitting. Clean faucet screens. Use a filter certified to reduce lead (NSF/ANSI 53). Change its cartridge on time. Risk goes up during pipe work and for up to six months after. Ask your utility about a filter when they work on your line. Bathing and showering are considered safe.
Who to call
Your water utility first, for records, testing, and replacement programs. A state-certified lab for water testing. A licensed plumber for the part on your property. Your child's doctor if a child may be exposed.
Ask your inspector
“Where the water line enters the house, what is the pipe made of, and could it be lead?”
How to spot it
Start with your water utility. Look up your address in its list of service lines, called an inventory. Utilities serving over 50,000 people must post it online. Since late 2024, utilities must tell homes with known or possible lead lines. A short lead connector, called a gooseneck, may link your line to the main. You can look where the water pipe enters the house, near the main shutoff. Compare it to the photos in EPA's Protect Your Tap guide. Skip the guide's scratch test. Let your utility or a plumber confirm. Only a water test shows if lead is in your water.
Why it matters
Lead service lines can be a major source of lead in tap water. No safe blood lead level has been found for children. EPA's current rule calls for most utilities to replace lead lines within 10 years. That clock starts in November 2027. The rule is being challenged in court. Who pays for the part on your property depends on local rules and funding.
When this applies
Most likely in homes built before about 1986, when new lead pipe was banned. States had until June 1988 to start enforcing the ban. So a home built by then could still have one. Only homes on public water have a utility service line.
Copper water pipes joined before about 1986 may have lead in the solder at the joints.
Stop: Don't cut, heat, or re-solder water pipes yourself. Hire a licensed plumber.
Ask your inspector: “Is the copper plumbing original to the house, so its joints may contain lead solder?”
What to do about Lead solder on older copper water pipes
Safe first steps
Test your water through your utility or a state-certified lab. Use only cold water for drinking, cooking, and baby formula. Run the tap before drinking water that has been sitting. Clean faucet screens. If a test finds lead, use a filter certified to reduce lead. For repairs, a plumber must use lead-free solder.
Who to call
Your water utility or a state-certified lab for testing. A licensed plumber for repairs or new pipes.
Ask your inspector
“Is the copper plumbing original to the house, so its joints may contain lead solder?”
How to spot it
Look at copper pipes you can see, like under sinks. Also check near the water heater. Solder is the metal that seals each joint. You can't tell lead solder by looking. If the copper is original to a pre-1986 home, the joints may have lead. Only a water test shows if lead is in your water.
Why it matters
EPA says solder made or installed before 1986 had high lead levels. Lead gets into water when plumbing corrodes. The longer water sits in pipes, the more lead it may have. In homes without lead pipes, lead solder and brass faucets are common sources.
When this applies
Solder made or installed before about 1986 had high lead. States had until June 1988 to start enforcing the lead-free rule. So a home built by then could still have it. Homes re-piped later may not have it.
Brass or chrome-plated brass faucets and valves installed before 2014 can add lead to tap water.
Stop: Don't use hot tap water for cooking or baby formula. Don't drink from taps not meant for drinking, like hose spigots.
Ask your inspector: “Which drinking-water faucets and valves look original to the house?”
What to do about Older brass faucets and valves
Safe first steps
Use only cold water for drinking, cooking, and baby formula. Run water that has been sitting before you drink it. Clean faucet screens often. Test your kitchen tap water. When you replace a faucet, pick one certified as lead-free for drinking water.
Who to call
A licensed plumber to replace faucets and valves. Your water utility or a state-certified lab for testing.
Ask your inspector
“Which drinking-water faucets and valves look original to the house?”
How to spot it
Think about how old your kitchen and bathroom faucets are. Check the main shutoff valve and any brass fittings too. Before 2014, the legal lead limit for these parts was much higher. CDC says fixtures made before 1986 may contain lead. You can't tell by looking. Test the water from your kitchen tap.
Why it matters
EPA says brass or chrome-plated brass faucets are a common lead source. That's true even in homes without lead pipes. Warm or hot tap water can have more lead. Today's lead-free rule still allows a small amount of lead. But a new faucet certified to that rule can cut lead from that source.
When this applies
The lead limit for faucets and fittings dropped sharply on January 4, 2014. What matters is when a faucet went in, not when the home was built. An older home may already have newer faucets.
No utility tests a private well, so testing it for lead is up to you.
Stop: Don't open the well cap, pressure switch, or pump wiring. Call a licensed well contractor.
Ask your inspector: “Can your certified lab test my well water for lead, and exactly how should I take the sample?”
What to do about Private well water and lead
Safe first steps
Have a state-certified lab test your water for lead. Follow the lab's sampling steps exactly. Ask your local health department what else to test for. Until you have results, use cold water for drinking and cooking. Run water that has been sitting. If lead is found, use a filter certified to reduce lead.
Who to call
A state-certified drinking water lab. Your local health department. A licensed well contractor or plumber for repairs.
Ask your inspector
“Can your certified lab test my well water for lead, and exactly how should I take the sample?”
How to spot it
Ask the seller if the home is on a private well. A well pump or pressure tank is a common clue. No utility tests your water or tracks your pipes. Corrosive well water can pull lead from pipes, solder, and faucets. You can't see, taste, or smell lead in water.
Why it matters
Federal drinking water law doesn't cover private wells. Most states don't regulate them either. So no one sends you a lead notice or tests for you. No safe blood lead level has been found for children. Testing is the only way to know.
When this applies
Any home on a private well. Older plumbing or corrosive water raises the risk.
Polybutylene (PB) is a gray plastic water pipe used in many homes from the late 1970s to the mid-1990s.
Stop: Don't bend, twist or tighten PB pipe or its fittings. Don't move attic insulation to look for it. Leave removal to a licensed plumber.
Ask your inspector: “Did you see polybutylene pipe anywhere, including at the water heater and main shutoff, and has the house been fully or only partly re-piped?”
What to do about Polybutylene (gray plastic) water pipe
Safe first steps
Look at the pipes you can see near the water heater and under sinks.
Find your main water shutoff. Make sure it is easy to reach.
Check under sinks and near the water heater for drips, stains or soft spots.
Ask the seller for any re-pipe permit or invoice. Note if it covered the whole house or only part.
If you are buying, call your insurance agent early, before your inspection period ends.
Who to call
A licensed plumber to confirm PB and quote a re-pipe. Your insurance agent. In Florida, a licensed inspector for a 4-point insurance inspection (a check of the roof, wiring, plumbing and heating).
Ask your inspector
“Did you see polybutylene pipe anywhere, including at the water heater and main shutoff, and has the house been fully or only partly re-piped?”
How to spot it
Look only at pipes you can see. Check near the water heater, under sinks, and where pipes leave the walls. PB is plastic, not metal. It is usually gray, but can be silver or black. It bends a little. It is not stiff white PVC or CPVC pipe. Its fittings may be held by small copper or aluminum bands. PB carries clean water to your taps. It was not used for drain or sewer pipes. It can be hidden in walls, ceilings or under attic insulation, so it can be missed. InterNACHI's inspector standard doesn't require finding PB, so ask directly.
Why it matters
HUD says PB fittings failed in many homes. Some PB pipe also broke down early from hot, chlorinated water. A failure can cause water damage. A class-action settlement paid for many re-pipes. Its claim deadline was May 1, 2009. That deadline has passed. A pipe trade group says PB has since been removed from U.S. plumbing codes. Today PB can limit your insurance choices.
Insurance note
Florida: Citizens won't write a new policy for a home over 20 years old that has PB. Its FAQ lists six policy forms, including the HO-3 homeowner form. Citizens also needs a 4-point inspection for homes over 20 years old. That is a check of the roof, wiring, plumbing and heating. The form asks about PB by name. Other insurers set their own rules, so ask before you buy.
When this applies
A court settlement covered PB put in from 1978 to mid-1995. PB first came out in the 1970s. We show this for homes built up to about 1996. Older homes are included because some were re-plumbed with PB in those years.
Check firstBuilt 1970 or earlierHealthInsuranceResale
Galvanized pipe is iron or steel water pipe coated with zinc, common in older homes.
Stop: Don't scrape, sand, cut or unscrew old pipes or joints yourself. Old pipe can break and leak. The buildup inside may hold lead.
Ask your inspector: “Is any of the water pipe galvanized steel, including the line from the meter, and how much of it is still in use?”
What to do about Galvanized steel water pipe
Safe first steps
Try the magnet test on water pipes you can see.
Note any low pressure or brown water.
If you have a water utility, ask what your service line is made of. Utilities must make their service line list public.
Test your water for lead. Your utility or a state-certified lab can help.
Until you know, use only cold tap water for drinking, cooking and baby formula. Boiling does not remove lead.
Get a licensed plumber's quote to replace old galvanized pipe.
Who to call
Your water utility, a state-certified drinking water lab, and a licensed plumber.
Ask your inspector
“Is any of the water pipe galvanized steel, including the line from the meter, and how much of it is still in use?”
How to spot it
Look at pipes near the water heater, the main shutoff, and in a basement or crawl space. Galvanized pipe is dull gray metal. Hold a fridge magnet to it. A magnet sticks to galvanized pipe. It won't stick to copper, plastic or lead. If a dull gray pipe won't hold a magnet, it may be lead. Don't scratch it. Ask your water utility or a plumber to check it. Gas pipes can be steel too. Only test pipes that carry water. Warning signs are weak water pressure and brown water.
Why it matters
Over time, galvanized pipe can rust and build up scale inside. That can cause low water pressure and brown water. The zinc coating can also contain some lead. A service line is the pipe from the street to your home. EPA says a galvanized service line can soak up lead if it sat downstream of lead pipe. It can release that lead into your water later. You can't see, taste or smell lead in water. Testing is the only sure way to know. A 2024 EPA rule tells water systems to replace some galvanized service lines they control. That rule is being challenged in court.
Insurance note
Florida: the Citizens 4-point form has a Galvanized box. It also asks if the home was re-piped. Citizens' public FAQ does not list galvanized pipe by itself as a reason to decline. It does list active leaks and plumbing that doesn't work right. Other insurers set their own rules, so ask before you buy.
When this applies
A water utility says galvanized pipe was common before the 1960s. HUD says copper replaced it after World War II, and plastic from the 1970s. Dates vary by area, so we show it for homes built before about 1970. Some older homes keep a few galvanized sections after a partial re-pipe.
Kitec is a brand of plastic water pipe with a thin aluminum layer, sold from about 1995 to 2007.
Stop: Don't twist, bend or tighten Kitec fittings, and don't scrape off the white crust. Let a licensed plumber handle it.
Ask your inspector: “Did you see any Kitec or other plastic-aluminum pipe with a printed brand name, and do any fittings show white crust, leaks or bulging?”
What to do about Kitec plastic-aluminum water pipe
Safe first steps
Look for orange or blue pipe near the water heater and under sinks.
Check the pipe for a printed brand name.
Look for white crust, drips or stains at the fittings.
Find your main water shutoff and make sure it is easy to reach.
Have a licensed plumber confirm it and quote a replacement.
Who to call
A licensed plumber. Your insurance agent if you are buying.
Ask your inspector
“Did you see any Kitec or other plastic-aluminum pipe with a printed brand name, and do any fittings show white crust, leaks or bulging?”
How to spot it
Look near the water heater and under kitchen and bath sinks, where pipes leave the wall. Most Kitec is bright orange (hot) or bright blue (cold). It was also sold in red, gray and black. Normal PEX pipe comes in these colors too, so color alone doesn't prove it. Look for a name printed on the pipe, such as Kitec, PlumbBetter, IPEX AQUA, WarmRite or XPA. Fittings may be stamped Kitec or KTC. Warning signs are white crust on a fitting, or pipe that looks black or bulging.
Why it matters
Kitec fittings and pipe can fail. That can cause leaks, flooding and water damage. Problems often show up first near the water heater. Kitec was the subject of a class-action settlement in the U.S. and Canada. The claim deadline was January 9, 2020, so it is closed to new claims. Insurers and buyers may ask about it.
Insurance note
Your insurer may ask about Kitec or have its own rules, so ask before you buy. The Florida Citizens 4-point form has no Kitec box. An inspector may list it under Other.
When this applies
A Canadian real-estate regulator says Kitec was sold from 1995 to 2007. We show it for homes built up to about 2008. Older homes are included because some were re-plumbed in those years.
Cast iron is heavy metal drain pipe that was common in homes until the 1970s.
Stop: Don't hit, cut or pry old drain pipe. Don't break into walls or slab floors yourself. If sewage backs up, stop using water and stay out of it.
Ask your inspector: “What are the main drain pipes made of, and can a plumber run a camera through the main drain to check for cracks or rust?”
What to do about Old cast-iron drain pipes
Safe first steps
Look at drain pipes you can see without moving anything.
Note slow drains, gurgling or repeat backups.
Before buying an older home, ask for a camera inspection of the main drain.
Keep records of any drain repair or replacement.
Read the water-damage part of your insurance policy.
Who to call
A licensed plumber with a drain camera.
Ask your inspector
“What are the main drain pipes made of, and can a plumber run a camera through the main drain to check for cracks or rust?”
How to spot it
Drain pipes carry used water out of the house. Cast iron is thick, heavy, dark gray or black metal pipe. Look in a basement, crawl space, garage or under sinks. In homes on a concrete slab, drains often run under the floor, out of sight. Warning signs are rust flakes, cracks or wet stains on the pipe. Also watch for slow drains, gurgling, sewer smells or backups that keep coming back.
Why it matters
HUD says cast iron can rust. Old drain pipe can crack or leak, often where you can't see it. That can cause backups and hidden water damage. In 2022, a trade paper said cast-iron drain claims were a new target in Florida insurance fights. Your policy's exact wording matters.
Insurance note
Florida: A 2022 Insurance Journal story said non-weather water claims had led to court rulings both ways. It called cast-iron drain claims a new target. The exact policy wording was often in dispute. The Florida Citizens 4-point form asks the drain pipes' age and whether they were re-piped. Ask your agent how your policy treats drain leaks.
When this applies
HUD says plastic replaced most cast-iron drain pipe in the 1970s. We show this for homes built before about 1980. Cast iron is still sold, so a newer home can have some too.
Orangeburg is a buried sewer pipe made of wood fiber and tar, used from about the 1940s to the early 1970s.
Stop: Don't dig down to the pipe or run a rented drain cutter through it. Cutters can damage this pipe, and one city says it may contain asbestos. Before anyone digs, call 811, the free call-before-you-dig line.
Ask your inspector: “Can a sewer camera be run from the cleanout to the street to check for Orangeburg pipe, flattening or roots?”
What to do about Orangeburg (tar-paper) sewer pipe
Safe first steps
Find your sewer cleanout. It is often a capped pipe outside near the house. Leave the cap on.
Don't pour solvents, paint thinner, mineral spirits or adhesive cleaners down drains. One city says they break down this pipe.
Get a sewer camera inspection, especially before you buy.
Ask your city or county which part of the sewer line you own.
Who to call
A licensed plumber or sewer contractor with a camera, and your city or county sewer department.
Ask your inspector
“Can a sewer camera be run from the cleanout to the street to check for Orangeburg pipe, flattening or roots?”
How to spot it
You usually can't see it. It is the buried pipe that carries waste from the house to the street or septic tank. It is black and made of wood fiber soaked in tar. Clues are a sewer line put in from the 1940s to the early 1970s, slow drains, or backups that keep coming back. A sewer camera inspection is the way to know.
Why it matters
Orangeburg can lose its round shape and flatten over time. Roots can get in at the joints, and joints can shift or break. When the line fails, sewage can back up into the house. One city says replacing the pipe is often the only lasting fix. The owner is often responsible for the part of the line on their land. Some utilities make owners fix a bad line. Pinellas County Utilities in Florida is one. If its inspection finds a defect, the owner must repair or replace the line at their own cost.
When this applies
Orangeburg sewer pipe was used from about the 1940s to the early 1970s. Its maker closed in 1974. We show it for homes built up to about 1975. Older homes are included because some got a new sewer line in those years.
Older clay sewer pipe was easy for tree roots to enter, and roots can crack and block the line.
Stop: Don't dig near the sewer line or hack at roots yourself. Before anyone digs, call 811, the free call-before-you-dig line. If sewage backs up, stop using water and stay out of it.
Ask your inspector: “What is the sewer line made of, and does a camera show roots, cracks, shifted joints or sags between the house and the street?”
What to do about Tree roots in an older clay sewer line
Safe first steps
Learn where your sewer line runs and where the cleanout is.
Watch for gurgling toilets, wet floor drains or slow drains.
Get a sewer camera inspection.
If it shows roots, ask a plumber about cleaning versus repair or lining. Some utilities, such as Pinellas County Utilities in Florida, count roots in the pipe as a defect the owner must fix.
Don't cut down healthy trees as a fix. Seattle says it likely won't solve a root problem.
Ask your city where your part of the line ends.
Who to call
A licensed plumber or sewer contractor with a camera, and your city's sewer utility.
Ask your inspector
“What is the sewer line made of, and does a camera show roots, cracks, shifted joints or sags between the house and the street?”
How to spot it
The pipe is buried, so look for clues. Watch for big trees near the sewer line and gurgling toilets. Also watch for wet spots around floor drains, slow drains or repeat backups. A sewer camera can show roots, cracks and shifted joints.
Why it matters
Older sewer lines were built from short pipe sections joined together. Many older clay and concrete joints were not watertight. Roots grow toward the water and get in at the joints. They can crack the pipe and cause sewage backups. Owners are often responsible for this line. Cutting down the tree likely won't fix it, because roots spread far.
When this applies
One city says clay sewer pipe was common until the late 1980s. Dates vary by city, so we show this for homes built before about 1990. It shows when you have trees near the sewer line.
A sewer scope is a camera check of the buried pipe that carries waste away from the house.
Stop: Don't open the cleanout cap or run a drain machine yourself. Sewage can spill out if the line is blocked.
Ask your inspector: “Does your inspection include a sewer camera from the cleanout to the city sewer or septic tank, and will I get the video and the pipe type in writing?”
What to do about Sewer camera inspection (sewer scope)
Safe first steps
Before buying an older home, add a sewer scope to your inspections.
Ask for the video and a written note of the pipe type and any problems.
Ask that the camera go all the way to the city sewer, or to the septic tank if you have one.
Check local rules. In parts of California's East Bay, a sale can't close without proof the sewer line doesn't leak. Pinellas County Utilities in Florida has offered rebates for camera checks when funds allow.
Who to call
A sewer scope inspector or licensed plumber. Your city or county sewer utility. If you have septic, a licensed septic contractor.
Ask your inspector
“Does your inspection include a sewer camera from the cleanout to the city sewer or septic tank, and will I get the video and the pipe type in writing?”
How to spot it
This is a check, not a part of the house. Ask the seller if the sewer line was ever camera-checked or replaced. Ask if there is an outdoor cleanout. That is a capped pipe in the yard that opens into the sewer line. In a sewer scope, a plumber pushes a small camera through the line and records video.
Why it matters
A standard home inspection looks only at pipes you can see. Florida's inspector rule and InterNACHI's standard don't require checking buried pipes. A new ASHI standard, not yet in effect, says inspectors don't have to use sewer cameras. So a broken or root-filled sewer line can be missed. Pinellas County Utilities in Florida says many owners get no warning before a line fails. A failed line can back sewage up into the house.
When this applies
Any home with a sewer line can get one. It matters most for older homes and homes with big trees near the line. On a septic system, the camera runs to the tank instead.
PEX, CPVC and copper are common water pipes that model plumbing codes still list.
Stop: Don't cut, solder or re-pipe water lines yourself. Leave that work to a licensed plumber.
Ask your inspector: “What type of water pipe does the house have, when was it installed, and does it serve the whole house or only part of it?”
What to do about PEX, CPVC and copper water pipe
Safe first steps
Know where your main water shutoff is.
Keep the permit and invoice for any re-pipe.
Now and then, check under sinks and near the water heater for drips at fittings.
Who to call
A licensed plumber, if you see a leak.
Ask your inspector
“What type of water pipe does the house have, when was it installed, and does it serve the whole house or only part of it?”
How to spot it
PEX is bendable plastic tubing. It is often red, blue or white and usually has PEX printed on it. CPVC is stiff, white or off-white plastic pipe with glued joints. Copper is penny-colored metal. Don't confuse PEX with gray polybutylene. Also don't confuse it with Kitec. Kitec is often orange or blue, with a name like Kitec or XPA printed on it.
Why it matters
These are normal pipes. Model plumbing codes still list them for water lines. Like any pipe, they can still leak at fittings. Insurers may ask what pipe you have and when it went in.
Insurance note
Florida: the Citizens 4-point form asks the year PEX was installed and whether the home was fully or partly re-piped. Keep your re-pipe permit and invoice to show your insurer.
When this applies
Any home can have these. HUD says copper tubing got its ASTM standard in 1932. CPVC was first used in 1959. PEX has been used in the U.S. since the 1980s. They are common in newer homes and re-pipes.
AI-generated illustration, not a photo of a real home.
Roof age: when was the whole roof last replaced?
Plan forAny homeInsuranceResale
The age of your roof affects leak risk, repair planning, resale, and sometimes home insurance.
Stop: Do not climb onto or walk on the roof. Use binoculars from the ground, or hire a professional.
Ask your inspector: “What is the roof made of, when was the whole roof last replaced, and how many years of useful life does it have left?”
What to do about Roof age: when was the whole roof last replaced?
Safe first steps
Find the date the whole roof was last replaced, and keep the proof. Check ceilings for stains after heavy rain. Before you buy, ask a roofer how many years the roof has left. If your insurer asks about roof age, ask what proof it needs.
Who to call
A licensed roofing contractor. For insurance questions, your agent and an inspector your insurer accepts.
Ask your inspector
“What is the roof made of, when was the whole roof last replaced, and how many years of useful life does it have left?”
How to spot it
Look up the last full re-roof permit with your city or county. Check the seller's disclosure and roofer receipts. From the ground, use binoculars to look for missing, curled, or cracked shingles or tiles. Inside, look for water stains on ceilings.
Why it matters
An old or worn roof can leak and cause water damage inside. A 2007 home builders' study put asphalt shingle roof life at about 20 years. It put slate, copper, and clay or concrete tile roofs at over 50 years. Real life depends on weather, materials, installation, and upkeep. Some insurers look at roof age when they write or renew a policy.
Insurance note
Florida: a homeowners insurer may not refuse to issue or renew your policy solely because of roof age if the roof is less than 15 years old. If the roof is 15 or more years old, the insurer must let you get a roof inspection, at your cost, before it requires a new roof. If that inspection shows at least 5 years of life left, the insurer may not refuse you solely because of roof age. This does not apply to mobile home policies. Citizens asks for proof of at least 5 years of life left on shingle roofs over 25 years old. For tile, slate, clay, concrete, or metal roofs, that starts at over 50 years. Other insurers set their own rules.
When this applies
Any home. This goes by the date the whole roof was last replaced, not the year the house was built. With no records, assume the roof could be as old as the house.
Plan forBuilt 2000 or earlierHealthResaleGood to know
Older hard cement siding shingles, flat cement panels, and some old roofing were made with asbestos.
Stop: Do not sand, scrape, cut, drill, break, or power-wash asbestos-cement siding or shingles. Do not break up or toss pieces until you check local rules.
Ask your inspector: “Is this siding or roofing asbestos-cement, and does our roof, siding, or window project need a licensed asbestos contractor?”
What to do about Asbestos-cement siding and roofing
Safe first steps
If it is intact, leave it. New Jersey's health department says it can be sided over. It says a coat of paint can help lock in fibers on worn siding. Ask a pro before any prep work. Get it tested before re-siding, drilling, or roof work. After a storm, keep kids and pets away from broken pieces. Check local disposal rules before throwing any away.
Who to call
A trained asbestos inspector to test. A licensed asbestos abatement contractor (a company trained to repair or remove asbestos) to remove it. In Florida, a licensed roofing contractor may remove asbestos roofing without an asbestos license. That is allowed only when a trained roofing supervisor directs the work on site.
Ask your inspector
“Is this siding or roofing asbestos-cement, and does our roof, siding, or window project need a licensed asbestos contractor?”
How to spot it
Look for hard, brittle siding shingles. They are usually light green, beige, or grayish-white. Some old flat cement siding panels are about 1/8 inch thick and 4 by 8 feet. They are brittle. Old roof felt and some roof cement or coatings can also contain asbestos. Don't break a piece to check. Newer fiber-cement siding can look alike. Only a lab test can tell.
Why it matters
Intact cement siding holds fibers tightly. Cutting, drilling, sanding, breaking, or tearing it off can release them. So re-siding, new windows, a new roof, storm cleanup, and demolition are the risky times. Removal and disposal can cost more and follow extra rules.
When this applies
New Jersey's health department says asbestos-cement siding and shingles were used from about 1940 on. It says asbestos roof felt goes back to about 1910. There is no clean end date. Around 1992, one maker told EPA, the federal environmental agency, that its asbestos-cement shingles were still being sold and installed in the U.S. A federal minerals report says most U.S. asbestos used in 2000 went into roofing products. Go by when the siding or roof went on.
Check firstBuilt 2000 or earlierHealthSafetyInsurance
Storm, fire, or flood damage can break open old building materials that may contain asbestos.
Stop: Do not crush, grind, dry-sweep, or burn debris from an older home. Do not tear out damaged old ceilings, walls, siding, or pipe wrap yourself before testing.
Ask your inspector: “Which damaged materials in this home could contain asbestos, and what should be tested before repairs start?”
What to do about Storm, fire, or flood damage in an older home
Safe first steps
Keep kids and pets away from broken old materials. Tell your insurer about the damage before tear-out starts. Have damaged old materials tested before repairs. EPA says wet drywall and wood can grow mold after about a day. So ask for quick testing. If suspect materials are damaged, EPA says to get help from specially trained contractors. Don't pick up or bag broken old materials yourself. A regular dust mask is not enough to protect you from asbestos.
Who to call
Your insurance company. A trained asbestos inspector to test damaged materials. A licensed asbestos abatement contractor (a company trained to repair or remove asbestos) for tear-out and cleanup. In Florida, testing must be done by or under a state-licensed asbestos consultant. Removal needs a state-licensed asbestos contractor, with a few exceptions.
Ask your inspector
“Which damaged materials in this home could contain asbestos, and what should be tested before repairs start?”
How to spot it
After damage, look from a safe spot. Watch for broken siding or roof shingles. Also look for fallen ceiling texture or tiles, and torn pipe wrap or insulation. Federal safety agencies list these as places asbestos may be found in older homes. You can't tell by looking. Treat broken old materials as possible asbestos until tested.
Why it matters
Damage turns solid materials into broken, crumbly debris. Cleanup and tear-out can then put fibers in the air. EPA says suspect materials should not be disturbed. Florida's environmental agency warns that storm debris may contain asbestos. It says never to burn building debris.
Insurance note
Washington State's insurance regulator says homeowners debris coverage can include testing and removing asbestos. That applies only when a peril your policy covers, like fire, caused the damage. Flood usually needs a separate policy. This is one state's general guidance, not a promise for your policy. Ask your insurer what is covered before work starts.
When this applies
EPA, the federal environmental agency, says buildings built before 1970 are more likely to contain asbestos. But some asbestos products were still sold after that. A federal minerals report says asbestos roofing products were still used in 2000. So this applies to homes built before about 2000.
Check firstWent in about 2001–2009HealthSafetyInsuranceResale
Some drywall put in from 2001 to 2009 gave off sulfur gases that corrode copper and other metals.
Stop: Do not cut, sand, or tear out drywall. Do not remove outlet covers or open the electrical panel or AC unit. A rotten-egg smell can also mean a gas leak. If you have gas and smell it, leave now. Do not flip switches or use your phone inside. Call 911 or the gas company from a neighbor's house.
Ask your inspector: “Do you see blackened copper wiring or AC coils here, and if so, what tests would confirm or rule out problem drywall?”
What to do about Problem drywall installed 2001–2009
Safe first steps
Find out when your drywall went in. Check permits, closing papers, and remodel or storm-repair records.
Write down any smell and when it is worse.
Keep your AC repair records. Ask your AC tech if the coils or copper lines were black.
Test your smoke and CO alarms.
Before any tear-out, hire a pro who uses the two-step check from CPSC and HUD.
Who to call
A home inspector or indoor air pro who follows the CPSC and HUD drywall guidance. A licensed HVAC contractor for AC coils. A licensed electrician for outlets, switches, and breakers. Your doctor if you have symptoms. A real estate attorney before you buy or sell a home that may have it.
Ask your inspector
“Do you see blackened copper wiring or AC coils here, and if so, what tests would confirm or rule out problem drywall?”
How to spot it
This only matters if drywall went in from 2001 to 2009. That includes a remodel or storm repair. Look for bare copper that has turned black instead of green. Only check spots you can see without opening anything. One example is the copper lines at the indoor AC unit. AC coils that were replaced because they turned black are a clue. So is a rotten-egg or sulfur smell. Some boards are stamped as made in China. That is only a clue. Not all drywall from China is a problem. And some problem boards have no label. A pro must confirm it.
Why it matters
Federal studies linked this drywall to black corrosion on copper wiring and AC coils. Health officials say exposed people may have had eye and nose irritation, headaches, or breathing problems. Federal repair guidance calls for a lot of work. It says to replace the problem drywall. It also says to replace smoke and carbon monoxide (CO) alarms, outlets, switches, and breakers. The federal housing agency (HUD) estimated about 11,000 new homes were built with it. Most reports to the Consumer Product Safety Commission (CPSC) came from Florida.
Insurance note
A 2012 HUD report to Congress said insurers "consistently denied" these claims. They pointed to the pollution exclusion, a policy rule that leaves out pollution damage. In 2015, a Florida appeals court ruled for one insurer that denied a drywall claim. The owners had not proved a covered cause. Policies differ. Ask your insurer in writing before you count on coverage.
When this applies
The concern is drywall put in from 2001 through 2009. That can be a new home, a remodel, or storm repair. Most reports came from homes built in 2006–2007. A home built before 2001 is only at risk if drywall was added in those years.
Fire-treated roof plywood in 1980s townhouses and condos
Good to knowWent in about 1979–1990SafetyResale
Some 1980s townhouses and condos have fire-treated plywood roof boards that can weaken in attic heat.
Stop: Do not go past the attic hatch. Do not walk on the roof. Do not stir up the insulation. Do not pry, cut, or poke the roof boards.
Ask your inspector: “Is any roof sheathing near the shared walls fire-treated plywood, and does any of it look dark, brittle, or sagging?”
What to do about Fire-treated roof plywood in 1980s townhouses and condos
Safe first steps
Ask your HOA or past owners if the roof deck was ever replaced. Get the records.
Look only from the attic hatch, with a flashlight.
From the ground, look for sagging near shared walls.
Ask your home inspector to check the roof boards from the attic.
Who to call
A home inspector first. Then a structural engineer or licensed roofer. In a townhouse or condo, also call your HOA or condo board. The roof may be shared.
Ask your inspector
“Is any roof sheathing near the shared walls fire-treated plywood, and does any of it look dark, brittle, or sagging?”
How to spot it
This mostly applies to townhouses and condos. It is rare on detached houses. Some builders used fire-treated plywood on the roof near a shared wall. It often runs about 4 feet on each side of that wall. From the attic hatch, shine a flashlight on the roof boards near that wall. Warning signs are boards that look darker than the rest. Boards that look brittle or crumbly are another sign. From outside, look for a roof that sags or looks wavy near shared walls. Rot can look the same, so a pro must tell them apart.
Why it matters
Fire-treated means soaked with chemicals that slow fire. Some treatments used in the 1980s broke down in hot attics. The wood turned weak and brittle. In the worst cases, this took only 3 to 8 years. In many cases, the roof boards and roofing had to be torn off and replaced. A weak roof deck can be unsafe to walk on. HUD said in 1999 that most of the bad material had been replaced. It still matters if your roof deck is original.
When this applies
About 1979 to 1990. Building codes began allowing this plywood near shared walls in 1979. The problem treatments were used during the 1980s. It was mostly used on townhouses, condos, and apartments, not detached houses.
Some pressed-wood siding from these years swelled, cracked, and rotted when water got in.
Stop: Do not pull off boards or dig into soft spots. If the home was built before 1978, do not sand or scrape the paint. It may contain lead.
Ask your inspector: “Is this siding hardboard or OSB, and do you see swelling, rot, or soft spots near the ground, windows, doors, or roof lines?”
What to do about Hardboard or OSB wood-look siding (1980s–1990s)
Safe first steps
Walk around and photograph swollen, soft, or cracked spots.
Keep paint and caulk in good shape, especially at edges and nail holes.
Keep water off the walls. Clean gutters and aim sprinklers away.
Ask an inspector to name the siding type.
Who to call
A home inspector. A licensed siding contractor for repair quotes. For paint work on a pre-1978 home, a contractor certified by EPA for lead-safe work.
Ask your inspector
“Is this siding hardboard or OSB, and do you see swelling, rot, or soft spots near the ground, windows, doors, or roof lines?”
How to spot it
This siding is made of pressed wood fibers (hardboard) or glued wood chips (OSB). It is painted to look like wood. It often has a very even, stamped wood grain. Walk around the house. Look low on the walls and near the ground. Look around windows and doors, where decks attach, and where a roof meets a wall. Warning signs are swollen bottom edges and boards that wave or buckle. Also look for cracked edges, peeling layers, soft spots, and rot. A pro can tell you which type you have.
Why it matters
When water got in, some of this siding swelled, cracked, and rotted. Sometimes the wall behind it was damaged too. Some makers settled large class-action lawsuits. Those claim deadlines passed years ago. Makers said most problems came from poor installing and upkeep. Either way, good paint and caulk help keep water out.
When this applies
Class-action settlements covered siding put on from about 1980 to 1999. This kind of siding was also sold later, so age alone is not proof.
EIFS (exterior insulation and finish system) is foam board with a thin, stucco-like coat. Older types could trap water behind it.
Stop: Do not drill, cut, or poke holes in the wall. Do not pressure-wash it. Moisture-test holes must be made and sealed by a pro.
Ask your inspector: “Is this wall EIFS or traditional stucco, is it a barrier or drainage type, and do you recommend a moisture test near the windows, doors, and deck joints?”
What to do about EIFS "synthetic stucco" on wood-frame walls
Safe first steps
Check builder records or old inspection reports to learn if it is EIFS or real stucco.
Photograph stains, cracks, and caulk gaps near windows, doors, decks, and roof lines.
Keep gutters working. Aim sprinklers away from the walls.
Before you buy, sell, or do big repairs, hire an EIFS-trained inspector for a moisture test.
Who to call
An EIFS-trained inspector who does moisture testing, or a structural engineer. For repairs, a contractor with EIFS experience.
Ask your inspector
“Is this wall EIFS or traditional stucco, is it a barrier or drainage type, and do you recommend a moisture test near the windows, doors, and deck joints?”
How to spot it
EIFS looks like stucco. But it is foam board with a thin coating on top. To learn which you have, check builder papers or old inspection reports. Or ask a pro. Next, look where water can get in. Check around windows and doors, and under window sills. Check where decks attach and where a roof meets a wall. Warning signs are stains or streaks under windows, cracks, bulges, soft spots, and gaps in the caulk.
Why it matters
Older barrier EIFS was meant to stop all water at the surface. It had no path to drain water that got behind it. Water got in at windows, doors, and deck joints. It could get trapped and rot the wood behind the wall, out of sight. A big fix can mean removing the cladding and repairing the wall. Many EIFS buildings have had few or no problems. In 2003, North Carolina's Real Estate Commission spoke to agents. It said current or past synthetic stucco must be disclosed to buyers. Rules in other states may differ.
When this applies
EIFS came to the U.S. in the early 1970s. The older barrier type was the norm until about the late 1990s. Newer codes call for EIFS with a drainage layer on wood-frame walls. When your area adopted that rule varies. This only matters if your home has a stucco look.
Yellow flexible gas tubing (CSST) without a bond wire
Check firstAny homeSafety
Yellow-coated flexible gas tubing needs a bond wire to lower the risk of lightning damage.
Stop: Do not cut, bend, or move gas tubing. Do not clamp anything to it or add a bond wire yourself. Do not open your electrical panel. If you smell gas, leave now. Do not flip switches or use your phone inside. Call 911 or the gas company from a neighbor's house.
Ask your inspector: “Is there yellow CSST gas tubing here, and is it bonded with a thick wire to the home's main electrical grounding, as current code and the maker's instructions call for?”
What to do about Yellow flexible gas tubing (CSST) without a bond wire
Safe first steps
Without touching, look for yellow tubing in easy-to-see spots.
Look for the bond wire and its clamp.
Have a licensed electrician check the bond or add one.
Test your smoke and CO alarms.
Who to call
A licensed electrician. In some states, a licensed gas fitter trained on CSST can check it too. Your gas company or 911 for any gas smell. One maker says all owners should talk to a lightning safety pro. The question is whether they need a lightning protection system. That maker names Florida as a high-lightning state.
Ask your inspector
“Is there yellow CSST gas tubing here, and is it bonded with a thick wire to the home's main electrical grounding, as current code and the maker's instructions call for?”
How to spot it
CSST is a bendy metal gas tube with ridges that look like rings. It has a yellow plastic coating. Without touching, look near the gas meter or propane line. Also look near the water heater, furnace, dryer, and stove. Do not move any appliance to look. Much of it may be hidden in walls or the attic. Some newer tubing is black and marked AR, short for arc-resistant. Next, look for a thick wire clamped to a solid gas pipe or fitting. It should not clamp onto the bendy tube. The wire should run to the home's main electrical grounding. A separate ground rod just for the gas line is not a proper bond. If you can't tell, ask a pro.
Why it matters
A nearby lightning strike can make electricity jump between metal parts in a house. That spark can burn a hole in thin CSST. The result can be a gas leak or fire. Bonding links the tubing to the home's electrical grounding with a thick wire. One maker says bonding may reduce the risk. It does not make a home lightning-proof. The national gas code began requiring this bond in 2009. Older installs may not have it. A New Hampshire fire marshal bulletin says the fix can take as little as 20 minutes to an hour.
Insurance note
In 2015, Delaware's insurance department urged owners of homes with yellow CSST to have a licensed electrician check the bonding.
When this applies
Only for homes with natural gas or propane. CSST has been used in U.S. homes since about 1990. It can also be added to an older home during gas work. The national gas code first called for a direct bond wire in 2009. Local adoption dates vary.
Some old brass tubes that hook gas appliances to the gas pipe can come apart and leak.
Stop: Do not move the appliance to look. CPSC warns even a small move can make a weak connector fail. Do not replace it yourself. If you smell gas, leave now. Do not flip switches or use your phone inside. Call 911 or the gas company from a neighbor's house.
Ask your inspector: “Are any gas appliances hooked up with an old uncoated brass connector that CPSC says should be replaced?”
What to do about Old uncoated brass gas appliance connector
Safe first steps
Ask your gas company or a licensed plumber or gas fitter to check connectors on older gas appliances.
Replace the connector any time you replace or move a gas appliance. CPSC advises this.
Who to call
Your gas company, a licensed plumber or gas fitter, or a qualified appliance installer.
Ask your inspector
“Are any gas appliances hooked up with an old uncoated brass connector that CPSC says should be replaced?”
How to spot it
A connector is the bendy metal tube between a gas appliance and the gas pipe. The Consumer Product Safety Commission (CPSC) says the old brass kind was used most on gas stoves, ovens, and dryers. You usually can't see those without moving the appliance. So don't look behind them. Let a pro check. The risky kind is plain brass, gold in color, with no coating. Newer ones are stainless steel or have a plastic coating.
Why it matters
CPSC warned that some old brass connectors have a flaw where the tube joins the end piece. Over time the end can pull off. That can cause a serious gas leak, fire, or explosion. CPSC linked these connectors to deaths and injuries. It is hard to tell which ones are flawed. So CPSC says to replace any uncoated brass connector right away.
When this applies
CPSC said in 2010 these had not been made for more than 30 years. Homes built before about the mid-1980s are most likely to have one. A newer home can too if an old appliance and connector were moved in.
Crumbling concrete foundations (pyrrhotite) in CT and MA
Plan forWent in about 1983–2015Connecticut, Massachusetts onlyResaleInsuranceSafety
In parts of CT and MA, some foundations poured from 1983 to 2015 contain a mineral that makes concrete crack and crumble.
Stop: Do not drill, chip, or take concrete samples yourself. Do not patch or paint over cracks before an engineer sees them. Do not skip a foundation check when buying in the affected area.
Ask your inspector: “Is this house in the pyrrhotite area, and do the foundation walls show cracks that call for an engineer's visual check or a core test?”
What to do about Crumbling concrete foundations (pyrrhotite) in CT and MA
Safe first steps
Check if your town is in the affected area.
Photograph any basement wall cracks. Date the photos so you can track changes.
If you are in the area, hire a licensed engineer for a visual check. Ask if a core test makes sense.
In Connecticut, ask about state help with testing and repair costs. In Connecticut, you can also ask your town assessor to reassess a home with a damaged foundation.
If you are buying, have the foundation checked before you close.
Who to call
A licensed professional engineer who does crumbling-foundation checks. In Connecticut, use a CT-licensed engineer to qualify for state testing help. A lab for a core test. In Connecticut, CFSIC, a state-created company that helps pay for foundation repair. A real estate attorney if you are buying or selling.
Ask your inspector
“Is this house in the pyrrhotite area, and do the foundation walls show cracks that call for an engineer's visual check or a core test?”
How to spot it
First, check your location. Connecticut's testing help covers homes within 20 miles of a concrete company in Stafford Springs, CT. Nearby towns in central Massachusetts are also at risk. Then look at your concrete basement walls with a flashlight. Warning signs are cracks, bulging, or crumbling concrete. Damage can take decades to show. Some homes with the mineral show no signs yet. An engineer's visual check can link cracks to the mineral. A lab test of a small plug of concrete, called a core test, can find it even before cracks show.
Why it matters
The mineral is called pyrrhotite. When it meets water and air, it swells and cracks the concrete. Over time the walls can crack and crumble. Some damaged homes have been ruled unsafe to live in. The usual fix is to lift the house and pour a new foundation. The GAO, a federal watchdog agency, says this fix is costly. GAO also says insurers have largely denied these claims.
Insurance note
GAO says insurers have largely denied crumbling-foundation claims. In Connecticut, the state housing department says insurers cannot cancel or refuse to renew a policy because of a crumbling foundation.
When this applies
For parts of northeastern Connecticut and central Massachusetts. The concern is foundations poured from 1983 to 2015. An older home counts only if an addition's foundation was poured in those years.
Unbolted raised foundation in pre-1980 California homes
Check firstBuilt 1979 or earlierCalifornia onlySafetyInsurance
Older raised houses may not be bolted to their foundation, so a strong quake can push them off.
Stop: Do not go into the crawl space. Look only from the opening. Do not touch wires, pipes, or pipe wrap. Do not cut or drill the foundation or framing yourself.
Ask your inspector: “Is this house bolted to its foundation, and are the crawl space walls braced?”
What to do about Unbolted raised foundation in pre-1980 California homes
Safe first steps
Look from the crawl space opening for bolts, plates, and plywood bracing.
See if your ZIP code is in California's Earthquake Brace + Bolt program. It has offered grants to help pay for a retrofit. Sign-up opens for a limited time each year.
Get an assessment from a contractor in the program's directory.
Make sure your water heater is strapped. The program requires that too.
Who to call
A contractor from the Earthquake Brace + Bolt directory. They are California-licensed general contractors with FEMA retrofit training. For a complex house, a structural engineer.
Ask your inspector
“Is this house bolted to its foundation, and are the crawl space walls braced?”
How to spot it
A raised foundation leaves a crawl space under the floor. Some homes have short wood walls there, called cripple walls. From the crawl space opening, use a flashlight. Look at the wood board resting on top of the concrete foundation. Bolt heads or metal plates tying the wood to the concrete are a good sign. Plywood panels nailed to the short walls mean they are braced. If you see neither, the house may need a retrofit. A trained contractor can tell you for sure.
Why it matters
In a strong earthquake, a house that is not bolted down can slide off its foundation. Short walls that are not braced can collapse. Then the house can drop. FEMA names these as weak spots in older wood houses. A retrofit bolts the house to the foundation. It also braces the short walls with plywood.
Insurance note
Do you have a California Earthquake Authority policy? A qualifying retrofit on a pre-1980 wood-frame home may earn a premium discount. Ask your insurer what proof it needs.
When this applies
California retrofit programs target wood-frame homes built before 1980 on a raised foundation with a crawl space. A later home is less likely to need this.
AI-generated illustration, not a photo of a real home.
Tank water heater about 10 or more years old
Plan forAny homeSafetyInsurance
A tank water heater more than about 10 years old is worth replacing on your own schedule, before it fails.
Stop: Do not open burner covers, touch gas lines or controls, or work on the wiring. Never cap or plug the relief valve or its pipe.
Ask your inspector: “What is the manufacture date on the water heater, and does it have a relief valve with a proper discharge pipe?”
What to do about Tank water heater about 10 or more years old
Safe first steps
Write down the tank's age. Check around it for leaks, rust, and water on the floor. Keep gasoline and other flammable liquids out of that room. If the tank is about 10 or more years old, start planning a replacement.
Who to call
A licensed plumber. For a gas water heater, one qualified to work on gas.
Ask your inspector
“What is the manufacture date on the water heater, and does it have a relief valve with a proper discharge pipe?”
How to spot it
Find the label on the tank. It shows the brand and serial number. Sometimes it also shows the date it was made. If not, the serial number can often be decoded to find the date. Look for rust, leaks, rusty hot water, or rumbling sounds. Near the top, look for a relief valve. This safety valve lets out water if heat or pressure gets too high. It should have a pipe running down toward the floor.
Why it matters
Old tanks can leak and cause water damage. ENERGY STAR says to consider replacing one more than 10 years old before it becomes an emergency. A 2007 home builders' study put tank life at about 10 years. On older gas tanks, fumes from gasoline stored nearby can catch fire. In 2003, CPSC reported nearly 800 such home fires a year.
Insurance note
Florida: Citizens requires a 4-point inspection when you apply for coverage on a property more than 20 years old. The form asks the water heater's age and whether it has a relief valve. Other insurers set their own rules.
When this applies
Any home with a tank water heater. This goes by the water heater's age, not the house's. Gas tanks of 30, 40, or 50 gallons made before July 1, 2003 came before a safer design that resists lighting nearby fumes.
Central AC or heat pump about 10 or more years old
Plan forAny homeInsuranceGood to know
A central AC or heat pump more than 10 years old is worth planning to replace. Older units may use R-22 refrigerant.
Stop: Do not open the unit's electrical panels or add refrigerant yourself. Only certified technicians may recharge a system. Do not let anyone use unapproved R-22 substitutes like R-22a. EPA warns they can cause fires or explosions.
Ask your inspector: “What date and refrigerant type are on the outdoor unit's nameplate, and when was the system last serviced?”
What to do about Central AC or heat pump about 10 or more years old
Safe first steps
Take a photo of the nameplate. Change the filter as the manual says. Keep plants and debris clear of the outdoor unit. Have it serviced by a licensed HVAC company. If it is over 10 years old, start planning a replacement.
Who to call
A licensed HVAC contractor. Its technicians should hold EPA refrigerant certification (called Section 608).
Ask your inspector
“What date and refrigerant type are on the outdoor unit's nameplate, and when was the system last serviced?”
How to spot it
Find the metal nameplate on the outdoor unit. It lists the model and serial number and may show the date it was made. It usually lists the refrigerant, such as R-22 or R-410A. Refrigerant is the fluid that moves heat out of your home.
Why it matters
ENERGY STAR says to consider replacing a heat pump or central AC more than 10 years old. A 2007 home builders' study put AC life at about 10 to 15 years. It put heat pumps at about 16. No new R-22 has been made or imported in the U.S. since January 1, 2020. Cleaned-up used R-22 is still sold for repairs. EPA does not require you to replace an R-22 system.
Insurance note
Florida: Citizens requires a 4-point inspection when you apply for coverage on a property more than 20 years old. The form asks the heating and cooling system's age and last service date. It also needs photos of the dated nameplate. Other insurers set their own rules.
When this applies
Any home with central AC or a heat pump. This goes by the outdoor unit's age, not the house's. Many older units use R-22, an older refrigerant. Some newer replacement outdoor units do too. The nameplate tells you which one it has.
A furnace or boiler more than 15 years old is worth planning to replace. Fuel-burning units need a yearly check at any age.
Stop: Do not remove burner covers or panels, adjust gas controls, or patch vent pipes. If you smell gas, do not light anything. Leave the building right away. Call 911 and the gas company once you are outside.
Ask your inspector: “How old is the furnace or boiler, when was it last serviced, and is its vent pipe in good shape?”
What to do about Furnace or boiler about 15 or more years old
Safe first steps
Have a licensed professional inspect and service it once a year. Make sure you have working CO alarms. Keep anything that can burn at least 3 feet away from the furnace. Change the filter as the manual says. If it is over 15 years old, start planning a replacement.
Who to call
A licensed HVAC technician qualified for gas or oil equipment.
Ask your inspector
“How old is the furnace or boiler, when was it last serviced, and is its vent pipe in good shape?”
How to spot it
Look for a label or service sticker on the outside of the unit. It may show the model, serial number, or date. If the label is behind a panel, ask your HVAC technician to read it. Look for the date of the last service, too.
Why it matters
ENERGY STAR says to consider replacing a furnace or boiler more than 15 years old. A 2007 home builders' study put furnace life at about 15 to 20 years. A gas, oil, or propane unit that isn't working right can give off carbon monoxide (CO). CO is a poison gas.
Insurance note
Florida: Citizens requires a 4-point inspection when you apply for coverage on a property more than 20 years old. The form asks the heating and cooling system's age and last service date. Other insurers set their own rules.
When this applies
Any home with a furnace or boiler. This goes by the unit's age, not the house's. Gas, oil, or propane units need a yearly inspection at any age.
Old wrap and coatings on heating pipes, boilers, furnaces, and ducts can contain crumbly asbestos.
Stop: Do not tear, cut, patch, tape, or remove old pipe, duct, boiler, or furnace insulation yourself. Do not let workers rip it out before it is tested.
Ask your inspector: “Could the insulation on these pipes, ducts, boiler, or furnace be asbestos, and is any of it damaged?”
What to do about Pipe, boiler, furnace, and duct insulation
Safe first steps
Check it now and then for torn covers, crumbling, or pieces on the floor. Keep storage, kids, and pets away from damaged wrap. Tell any plumber or heating tech about it before they start. Have damaged wrap tested. Also test any wrap a job will disturb. The federal product-safety agency (CPSC) says even minor repairs should be done by pros.
Who to call
A trained asbestos inspector to take samples. A licensed asbestos abatement contractor (a company trained to repair or remove asbestos) to repair or remove it. In Florida, testing must be done by or under a state-licensed asbestos consultant. Removal needs a state-licensed asbestos contractor, with a few exceptions. Your heating or plumbing contractor should know about it before work starts.
Ask your inspector
“Could the insulation on these pipes, ducts, boiler, or furnace be asbestos, and is any of it damaged?”
How to spot it
Look but don't touch. Check basements and utility closets. For crawl spaces and attics, look from the door or hatch. Don't crawl in. Look for white or gray chalky wrap on hot water or steam pipes. It may be wrapped in a thin cloth cover. Some wrap looks like gray corrugated cardboard on pipes or ducts. Old furnaces and boilers may have white or gray chalky cement. Old ducts may have paper wrap, paper tape, or pleated 'accordion' connectors. Old oil and coal furnaces may have door seals (gaskets) with asbestos.
Why it matters
This kind of asbestos is often crumbly. Crumbly material is called friable. It releases fibers easily when bumped, torn, or worn with age. Furnace, boiler, plumbing, and AC jobs can disturb it. It can add surprise cost to a repair or flip.
When this applies
New Jersey's health department says pipe wrap was used most from about 1920 to the mid-1970s. OSHA, the federal worker-safety agency, treats pipe, boiler, and duct insulation in buildings built through 1980 as asbestos until tested. New Jersey also says furnace door seals with asbestos were made until the early 1980s. Homes built after about the mid-1980s are less likely to have these parts.
Heat shields, door seals, and fake embers on older wood stoves and gas fireplaces can contain asbestos.
Stop: Do not scrape, sand, drill, or tear out stove heat shields or door seals. Do not crumble or vacuum old gas-log embers. Do not work on gas fireplace parts yourself.
Ask your inspector: “Could the heat shield, door seals, or fake embers on this stove or fireplace contain asbestos, and should they be tested before we replace anything?”
What to do about Old wood stove and fireplace asbestos parts
Safe first steps
Leave intact cement sheets alone. They don't shed easily unless sawn, scraped, sanded, or crushed. Touch old stove seals as little as possible. Have a pro replace worn seals on older stoves. Leave old fake embers alone. Ask a pro before removing an old stove or gas-log set.
Who to call
A chimney or stove pro trained in asbestos handling. A licensed gas fireplace or appliance technician for gas-log sets. A trained asbestos inspector if parts must come out.
Ask your inspector
“Could the heat shield, door seals, or fake embers on this stove or fireplace contain asbestos, and should they be tested before we replace anything?”
How to spot it
Look but don't touch. Check the wall or floor around a wood stove. Look for gray or white cement sheets, soft board (called millboard), or paper. Check the rope-like door seals (gaskets) on wood or coal stoves. Check an old gas-log fireplace for fake ash or glowing 'embers.' Only a lab test can tell for sure.
Why it matters
California's contractor board says stove door seals wear out with normal use. As they wear, they can release fibers. Millboard is crumbly, so it sheds fibers more easily than cement sheet. Removing or replacing an old stove, insert, or gas-log set can disturb these parts.
When this applies
New Jersey's health department says stove door seals with asbestos were made from about 1940 to the early 1980s. EPA, the federal environmental agency, found asbestos millboard was still made in 1992. CPSC, the federal product-safety agency, banned asbestos fake fireplace embers in December 1977. A stove can be older than the house, so go by the age of the stove.
AI-generated illustration, not a photo of a real home.
Florida 4-point insurance inspection
Plan forBuilt 2007 or earlierFlorida onlyInsuranceResale
A 4-point is a short insurance check of four home systems: roof, wiring, plumbing, and heating and cooling.
Stop: Do not remove the electrical panel cover or touch wiring. The inspector handles the panel photos. Do not climb on the roof. Do not hide problems from the inspector.
Ask your inspector: “Is anything on this 4-point likely to stop my insurer from writing the policy, and what repair or paperwork would fix it?”
What to do about Florida 4-point insurance inspection
Safe first steps
Gather proof of updates. Look for permits or bills for roof, panel, pipe, water heater, or AC work. Note the year of each.
Read the AC and water heater labels for their ages. Do not open anything.
Have licensed pros fix known leaks or hazards first.
Book the 4-point before you shop for insurance. Keep a copy.
Who to call
A Florida-licensed home inspector. Citizens also accepts a licensed general, building, or residential contractor. A building code inspector or official, an architect, or an engineer can also do it. Ask your insurance agent what your insurer needs.
Ask your inspector
“Is anything on this 4-point likely to stop my insurer from writing the policy, and what repair or paperwork would fix it?”
How to spot it
Your agent or insurance application asks for a "4-point." It is not a full home inspection. A Florida-licensed pro looks at four things. They are the roof, electrical, plumbing, and heating and cooling. The pro takes photos and signs the form. Citizens, Florida's state-created insurer, requires one on applications for homes over 20 years old. The report must be less than a year old.
Why it matters
Insurers use the 4-point to decide whether to insure the home. Citizens says to fix serious problems before you apply. Examples are exposed wiring or active leaks. Its form says agents may not submit homes with hazards. Other insurers set their own age rules. For buyers, a poor report can delay getting a policy.
Insurance note
Citizens requires a 4-point on applications for homes more than 20 years old. The age was 30 before Feb. 1, 2022. The report must be from the past year. It does not apply to tenant or condo policies. Citizens relies on its sample form or a similar one. Other insurers set their own age rules, so ask your agent. Citizens rules last checked Sept. 2026.
When this applies
Citizens requires a 4-point when a home is more than 20 years old. Other insurers set their own ages.
Plan forBuilt 2007 or earlierFlorida onlyInsuranceSafety
Some older electrical panels, fuse boxes, and wiring types can make a Florida home hard to insure.
Stop: Do not open the panel, pull fuses, swap breakers, or touch wires. If a panel is hot, buzzing, wet, or smells burnt, stay away and call an electrician right away. If you see smoke, sparks, or flames, get everyone out and call 911.
Ask your inspector: “Will my panel brand, amps, or wiring type show up as a problem on the 4-point, and what repair proof will my insurer need?”
What to do about Old panels and wiring on a Florida 4-point
Safe first steps
Find any past 4-point, inspection, or electrician paperwork.
Ask your agent what your insurer accepts.
If there is a flag, get quotes from a Florida-licensed electrician.
Citizens accepts only three fixes for single-strand aluminum. They are a full copper rewire, COPALUM crimps, or AlumiConn connectors.
Keep the electrician's signed paperwork. For aluminum wiring fixes, Citizens requires it.
Who to call
A Florida-licensed electrical contractor for repairs. A licensed home inspector for the 4-point. Your insurance agent, to confirm what your insurer accepts. Call 911 for smoke, sparks, or flames.
Ask your inspector
“Will my panel brand, amps, or wiring type show up as a problem on the 4-point, and what repair proof will my insurer need?”
How to spot it
Start with paperwork. Check an old 4-point, the seller's disclosure, or electrician bills. They may list the panel brand, amps, and wire type. Some insurers flag Federal Pacific (FPE or Stab-Lok), Zinsco, Sylvania-Zinsco, and Challenger-Zinsco panels. Fuse boxes can be a flag too. If a brand name shows on the outside of the panel, write it down. Otherwise, let the inspector check. The 4-point needs photos with the panel cover off. Only a pro should do that.
Why it matters
The Citizens 4-point asks about cloth wiring and knob-and-tube wiring. Knob-and-tube is very old wiring held by ceramic knobs and tubes. The form also asks about aluminum wiring. It lists hazards like scorching, loose wires, and double taps. A double tap is two wires under a screw made for one. Citizens will not accept single-strand aluminum branch wiring unless it was fixed an approved way. New Citizens policies need at least 100-amp service. Amps measure how much power the panel can supply. Some private insurers refuse certain panel brands and fuse boxes. You may need a new panel before you can get coverage.
Insurance note
Citizens will not accept single-strand aluminum branch wiring. Branch wiring is the wire that runs to outlets and lights. It is OK if the home was fully rewired in copper. It is also OK if every connection was fixed with COPALUM crimps or AlumiConn connectors. Citizens does not accept Leviton products for this repair. Multi-strand aluminum is OK. A licensed electrician must certify the repair papers. New policies and rewrites need at least 100 amps. Policies in effect before Sept. 1, 2012 may keep the older 60-amp minimum. We found no public Citizens rule naming panel brands. Private insurers vary; one insurer's 2018 guide said no fuses and no Federal Pacific or Zinsco boxes. Citizens rules last checked Sept. 2026.
When this applies
Shown for homes old enough to need a Citizens 4-point, which is more than 20 years old. See the national electrical items for when each panel and wire type was used.
Pipes, leaks, and water heaters on a Florida 4-point
Plan forBuilt 2007 or earlierFlorida onlyInsuranceResale
Some plumbing can block or limit Florida home insurance. Common problems are polybutylene pipe, leaks, and some water heater details.
Stop: Do not test or open the water heater's relief valve. Hot water can burn you. Do not cut into walls to look at pipes. Do not work on a gas water heater or its vent.
Ask your inspector: “What pipe types did you find, and will polybutylene, a leak, or the water heater stop my insurer from writing the policy?”
What to do about Pipes, leaks, and water heaters on a Florida 4-point
Safe first steps
Find re-pipe papers and the water heater's install year.
Have a licensed plumber fix any leak now. Keep the bill.
If you may have polybutylene, get a re-pipe quote before you shop for insurance.
Buyers: ask the seller for the plumbing history.
Who to call
A licensed plumber for leaks and re-piping. A Florida-licensed home inspector for the 4-point. Your insurance agent.
Ask your inspector
“What pipe types did you find, and will polybutylene, a leak, or the water heater stop my insurer from writing the policy?”
How to spot it
Look for a re-pipe permit or bill first. Then look under sinks and near the water heater. Do not move, cut, or take apart any pipes. Only a plumber or inspector can confirm polybutylene. Color alone does not prove it. Read the water heater label for its age. Look for drips, rust, stains, or soft floors. Check near sinks, toilets, the water heater, and the AC drain line.
Why it matters
Polybutylene is a plastic water pipe found in some older homes. Citizens will not write new policies on homes over 20 years old that have it. Active leaks, unrepaired water damage, and plumbing in poor shape also make a home not eligible with Citizens. The 4-point asks the pipe type and whether the home was re-piped. It asks the water heater's age. It also needs a photo of the water heater's relief valve. That is a safety valve on the tank. Some private insurers refuse polybutylene too.
Insurance note
Citizens: new policies on homes more than 20 years old with polybutylene are not insurable on its main home, rental dwelling, and mobile home policy forms (HO-3, HO-8, DP-1, DP-3, MHO-3, MDP-1). Homes 20 years old or newer with polybutylene may be eligible if there are no leaks, damage, or hazards. Since March 2025, the 4-point needs a photo of the water heater's relief valve. We found no state or Citizens rule setting a top water heater age. Some private insurers also refuse polybutylene. Citizens rules last checked Sept. 2026.
When this applies
Citizens' polybutylene rule applies to homes more than 20 years old. Leak and water heater checks apply to any home on a 4-point. See the national plumbing item for when polybutylene was used.
Your roof's age affects whether Florida insurers will write or renew your policy.
Stop: Do not climb on the roof or a ladder to check it. Look from the ground or use binoculars. Do not sign a roofing contract under pressure after a storm.
Ask your inspector: “How many years of useful life does my roof have left, and will you put that in writing on a form my insurer accepts?”
What to do about Roof age and Florida home insurance
Safe first steps
Find the roof permit date and roof type.
If your insurer wants a 15+ year roof replaced, ask for an inspection first.
Get the years of life left in writing. Include photos of each roof slope.
Check your policy for a separate roof deductible.
If a nonrenewal notice comes, read the reason. Call your agent right away.
Who to call
An inspector your insurer approves. The law allows a licensed home inspector, building code inspector, contractor, roofer, engineer, or architect. A licensed roofing contractor for quotes. Your insurance agent.
Ask your inspector
“How many years of useful life does my roof have left, and will you put that in writing on a form my insurer accepts?”
How to spot it
Search your city or county's online permit records for the last full re-roof. Also check closing papers, the seller's disclosure, or roofer bills. From the ground, look for curled or missing shingles or cracked tiles. Look for shingle grit piling up at downspouts. Inside, look for ceiling stains. Florida law counts roof age from the last full replacement. A small patch does not reset it. If the roof was redone in parts until all of it was new, age counts from the first part.
Why it matters
Florida law limits how insurers use roof age on homeowners policies. It does not cover mobile home policies, and it may not cover landlord policies. Insurers may not refuse to sell or renew a policy just because the roof is under 15 years old. For roofs 15 or older, you can get an inspection first, at your cost. If it shows 5 or more years of life left, they may not refuse for age alone. Insurers can still say no for roof condition or other lawful reasons. Citizens has its own roof-age limits. Some policies also have a separate roof deductible.
Insurance note
Florida law (section 627.7011(5)) covers homeowners policies issued or renewed on or after July 1, 2022. It does not apply to mobile home policies. Citizens rules: shingle roofs over 25 years old need proof. So do tile, slate, clay, concrete, or metal roofs over 50 years old. The proof is 5+ years of life left or a full replacement. Citizens accepts its roof form. It also accepts the 4-point roof section with photos of each slope. Separate roof deductible (section 627.701(10)): it can be no more than 2% of dwelling coverage or half the roof replacement cost, whichever is less. It applies only to replacement-cost claims. It does not apply to total losses or hurricane roof losses. It does not apply when a tree or other hazard punctures the roof deck, the boards under the roof. It does not apply to repairs under half the roof. Until you show you paid it, the insurer may pay the roof part at actual cash value. That is the value after wear is subtracted. The law lets you reject this deductible on an approved form. For most nonrenewals, insurers must give 120 days' written notice with the reason (section 627.4133(2)(b)). Citizens rules last checked Sept. 2026.
When this applies
Any Florida home. Roof age counts from the last full roof replacement, not the year the house was built.
Wind mitigation inspection and hurricane discounts
Plan forAny homeFlorida onlyInsurance
A wind mitigation inspection lists the parts of your home that help it stand up to hurricane wind. Those features can earn insurance credits.
Stop: Do not crawl into the attic to look for straps. You could fall through the ceiling, and it gets very hot. Do not disturb old attic insulation. Sign the homeowner line only if the named inspector, or an employee they sent, really inspected your home and showed ID. Never ask anyone to mark features that are not there. A knowingly false form is a crime.
Ask your inspector: “Which answers on my wind form are keeping my discount lowest, and which one upgrade would change the form the most?”
What to do about Wind mitigation inspection and hurricane discounts
Safe first steps
Gather your roof permit, window and door papers, shutter bills, and any old wind form.
Hire an authorized inspector. Send the finished form to your insurer.
Ask your insurer how your credits changed.
After a new roof, windows, or shutters, get a new form.
Who to call
An authorized mitigation inspector. That includes a licensed home inspector with hurricane training or a certified building code inspector. A licensed general, building, or residential contractor can also sign. So can an engineer or architect.
Ask your inspector
“Which answers on my wind form are keeping my discount lowest, and which one upgrade would change the form the most?”
How to spot it
Ask your agent if a wind mitigation form is on file. The state form is OIR-B1-1802. Look for wind or hurricane credits on your policy papers. The form asks about the roof covering and the roof shape. It asks how the roof deck, the boards under the roof, is nailed. It asks how the roof ties to the walls. It asks about a sealed roof deck. That is an extra layer that keeps water out if shingles blow off. It asks about storm protection for windows and doors. A hip roof slopes down on all four sides. A FORTIFIED roof certificate, from a stronger-roof program, can back up some answers.
Why it matters
Florida law makes insurers include discounts for wind-resistant features. A signed form shows which features you have. Citizens says some roof credits can come from year built alone. Credits for window and door protection need the form. At Citizens, discounts apply only to the wind part of your premium. A new state form took effect April 1, 2026. A form is good for up to 5 years if the house has no major changes. If your form is older, ask your agent if it is still accepted.
Insurance note
Under Florida law (section 627.0629(1)), rate filings must include discounts for wind-loss features, including features that meet the Florida Building Code. Since Oct. 1, 2023, insurers must describe these discounts on their websites. Section 627.711 says insurers must send a discount notice at issue and each renewal. They must accept forms signed by authorized inspectors. An insurer may have your form checked or your home reinspected, at its own cost. A knowingly false form used to get a discount is a first-degree misdemeanor (section 627.711(8)). Citizens does not offer these discounts on mobile homes. Savings vary by insurer and location.
When this applies
Any Florida home. Homes permitted under the Florida Building Code, after about March 1, 2002, can check the code box. Older homes get credit for features the inspector verifies.
Built before or after Florida's 2002 building code
Good to knowBuilt 2003 or earlierFlorida onlyInsuranceGood to know
Florida's statewide building code took effect March 1, 2002. It shapes your wind insurance credits.
Stop: Do not open walls, ceilings, or the attic to see how the house was built. Do not assume a 2002 or 2003 build year counts without the permit date.
Ask your inspector: “Based on my permit date, which building code box will you check on my wind form, and what proof do you need from me?”
What to do about Built before or after Florida's 2002 building code
Safe first steps
Look up the year built and the permit application date.
If your home is older, get a wind mitigation inspection. It shows which features you have. It also shows which upgrades could help.
If your home was built before 2008, look into My Safe Florida Home grants.
Who to call
Your city or county building department, for permit records. A wind mitigation inspector.
Ask your inspector
“Based on my permit date, which building code box will you check on my wind form, and what proof do you need from me?”
How to spot it
Find the year built on your county property appraiser's website. If it says 2002 or 2003, you also need the permit application date. Your city or county building department has it. The permit date, not the year built, decides which code applies. In Miami-Dade and Broward, homes built from 1994 to 1996 need the permit date too.
Why it matters
Florida lawmakers found the statewide code helped cut hurricane damage. They also found weak spots in some homes built before it. The first question on the wind form asks which code the home was permitted under. Florida requires insurers to give credits for features that meet the code. The amount varies by insurer. Older homes can still earn credits for upgrades an inspector verifies.
Insurance note
On the state wind form, homes built in 2002 or 2003 need a permit application dated after March 1, 2002 to check the Florida Building Code box. Miami-Dade and Broward homes have a separate box for the 1994 South Florida Building Code. For homes built there from 1994 to 1996, the permit must be dated after Sept. 1, 1994. section 627.0629(1) requires rate credits for features that meet the code. Amounts vary by insurer.
When this applies
Homes built before about 2002 predate the statewide code. For homes built in 2002 or 2003, the permit application date decides.
Plan forBuilt 2009 or earlierFlorida onlyInsuranceGood to know
On older roofs, a big partial repair can require redoing the covering on the whole roof or roof section.
Stop: Do not go on the roof. Do not let anyone do big roof repairs without a permit. Do not assume insurance will pay for a whole new roof.
Ask your inspector: “Was my roof built or replaced to the 2007 Florida Building Code or later, so only repaired parts would need to meet current code?”
What to do about Florida's 25% roof repair rule for older roofs
Safe first steps
Find your roof permit date and roof type.
Check your policy for law and ordinance coverage.
After a storm, take photos of damage from the ground.
Call your insurer and a licensed roofer.
Make sure repairs have a permit.
Who to call
A licensed roofing contractor. Your local building department. Your insurance agent, to review law and ordinance coverage.
Ask your inspector
“Was my roof built or replaced to the 2007 Florida Building Code or later, so only repaired parts would need to meet current code?”
How to spot it
Find the last full re-roof permit date in your building department's online records. Roofs built or replaced to the 2007 Florida Building Code or later get an exception. That code took effect March 1, 2009. If your roof is older, or the date is unknown, the rule may apply. Ask a licensed roofer or the building department.
Why it matters
The building code limits repairs on older roofs. You may repair no more than 25% of a roof or section in 12 months. Past that, the covering on the whole roof or section must meet current code. So storm damage to part of an older roof can become a much bigger job. For roofs built to the 2007 code or later, only the repaired part must meet current code. Law and ordinance coverage helps pay extra costs to meet code. But Florida law limits it to the damaged part, unless total damage is over half the cost to rebuild the home.
Insurance note
Law and ordinance coverage pays extra costs to meet building codes. Unless you reject it in writing, a Florida homeowners policy includes it at 25% of the dwelling limit. Insurers must also offer 50%. By law it covers only repairs to the damaged part, unless total damage is over 50% of the home's replacement cost. Whether a claim pays for undamaged roof areas depends on your policy and claim. Local governments may not change the 2007-code exception.
When this applies
Applies to roofs built or last fully replaced before the 2007 Florida Building Code took effect on March 1, 2009. An older home with a newer roof may get the exception.
Re-roofing a pre-2002 Florida home adds wind upgrades
Plan forBuilt 2003 or earlierFlorida onlyInsuranceGood to know
Replacing the roof on a Florida home built before the 2002 code usually must include some wind upgrades.
Stop: Do not hire a roofer who skips the permit. Do not go on the roof or into the attic yourself.
Ask your inspector: “Does my re-roof need the code's water barrier, deck nailing, and roof-to-wall ties, and does the quote include them?”
What to do about Re-roofing a pre-2002 Florida home adds wind upgrades
Safe first steps
Confirm your permit date before you get roof quotes.
Ask each roofer to list the water barrier and deck nailing in the quote.
Ask if roof-to-wall ties apply to your home.
Make sure the job has a permit.
After the job, get a new wind mitigation inspection.
Who to call
A licensed roofing contractor. Your local building department, to ask about your wind zone. A wind mitigation inspector after the job.
Ask your inspector
“Does my re-roof need the code's water barrier, deck nailing, and roof-to-wall ties, and does the quote include them?”
How to spot it
Check the year built and the permit date. The rule is for site-built single-family homes permitted before March 1, 2002. It applies when the roof covering is torn off and replaced on a wood roof deck. Ask each roofer if the quote includes the required upgrades.
Why it matters
Florida law usually requires two upgrades when these older homes get a new roof. One is a secondary water barrier. It helps keep water out if the roof covering blows off. The other is stronger nailing of the roof deck, the boards under the roof covering. Some homes must also add roof-to-wall ties at gable ends or corners. This applies only in the wind-borne debris region, a code zone for flying storm debris. The home must also be insured for $300,000 or more. If there is no insurance or no proof of its value, the tax value counts instead. Even then, ties are needed only if the work can be done for 15% of the re-roof cost. These features are also on the wind mitigation form. They may earn insurance credits.
Insurance note
These upgrades match questions on the state wind form: roof deck attachment, roof-to-wall attachment, and sealed roof deck (secondary water resistance). Credits vary by insurer.
When this applies
Applies to site-built single-family homes permitted before the Florida Building Code took effect March 1, 2002. Homes finished in 2002 or 2003 can fall on either side; the permit date decides.
A state program that offers free wind inspections and, for some homeowners, grants for hurricane upgrades.
Stop: Do not start work or pay for upgrades before your official grant approval notice. Apply only through the official program site.
Ask your inspector: “Which upgrades on my report could qualify for a grant and change my wind mitigation form the most?”
What to do about My Safe Florida Home inspections and grants
Safe first steps
Make an account at mysafeflhome.com and answer the questions.
Get the free inspection.
Apply for a grant within 24 months of that inspection. Name a licensed contractor.
Wait for the official approval notice.
Finish the work and ask for a final inspection within 18 months of approval. Matching grants are paid after the work is done.
Who to call
The My Safe Florida Home program, through mysafeflhome.com. A Florida-licensed contractor who pulls permits.
Ask your inspector
“Which upgrades on my report could qualify for a grant and change my wind mitigation form the most?”
How to spot it
Check your county property appraiser's website. You need a homestead exemption. For a grant, the home must also be built before Jan. 1, 2008. Apply only at the official site, mysafeflhome.com. It asks income questions to set your place in line. The program sets income groups using your county's median income. Low-income owners 60 and older go first. Next come other low-income owners, then moderate-income owners 60 and older. Then come other moderate-income owners. Higher-income owners cannot get grants. They may get a free inspection only if money is left, and they go last.
Why it matters
The free inspection lists upgrades, cost ranges, and possible insurance discounts. Eligible owners can then apply for a grant while funds last. Low-income owners can get up to $10,000 with no match. Moderate-income owners can get $2 from the state for each $1 they pay, up to $10,000. Grants can cover windows, doors, garage doors, and skylights. They can also cover roof-to-wall ties and roof-deck nailing. A secondary water barrier with a new roof covering can count too. For a grant, the home must be insured for $700,000 or less.
Insurance note
Grant recipients must share the discount details their insurer gives them after the work. Discounts vary by insurer. The program runs only while the Legislature funds it. When we checked in Sept. 2026, the program site said it was accepting applications.
When this applies
Grants are only for homes built before Jan. 1, 2008. The free inspection has no build-year limit. Both need a homesteaded, owner-occupied, site-built home. That can be a detached house, or a townhouse up to three stories on its own lot. Townhouse owners should ask the program which grant items apply.
If Citizens covers your home for wind, you need flood insurance from another company. The last homes phase in on Jan. 1, 2027.
Stop: Do not let flood coverage lapse if you have Citizens. Do not assume your homeowners policy covers flood.
Ask your agent: “Based on my flood zone and rebuild cost, when must I have flood insurance to keep Citizens, and how much coverage will Citizens accept?”
What to do about Citizens home policies require flood insurance
Safe first steps
If you have Citizens, find your renewal date.
Get flood quotes early from an agent. Ask about the National Flood Insurance Program (NFIP), run by the federal government. Also ask about private flood insurers.
Buyers: get a flood quote before you make an offer.
Keep proof of flood coverage with your policy papers.
Who to call
Your insurance agent, for Citizens and for flood coverage (NFIP or private).
Ask your agent
“Based on my flood zone and rebuild cost, when must I have flood insurance to keep Citizens, and how much coverage will Citizens accept?”
How to spot it
Check if your home policy is with Citizens Property Insurance. Look up your flood zone on FEMA's flood map. Find your dwelling replacement cost on your policy papers. That is the cost to rebuild, not the sale price.
Why it matters
Flood insurance is a condition of Citizens coverage. Citizens may deny coverage if you refuse to get it. The rule phased in by flood zone and by the cost to rebuild the home, not its sale price. For policies effective on or after Jan. 1, 2027, it covers all other Citizens home policies with wind coverage. Citizens may not sell flood insurance, so you must buy it elsewhere. A regular homeowners policy does not cover flood damage.
Insurance note
Under Florida law (section 627.351(6)(aa)), homes in FEMA high-risk flood zones (special flood hazard areas) need flood coverage. That started with new policies from April 1, 2023 and renewals from July 1, 2023. Other homes phase in by dwelling replacement cost (the cost to rebuild), for policies effective on or after: Jan. 1, 2024 ($600,000+), Jan. 1, 2025 ($500,000+), Jan. 1, 2026 ($400,000+), and Jan. 1, 2027 (all others). Exempt: policies without wind coverage and condo unit-owner policies. Citizens also lists tenant contents policies as exempt. Citizens asks for flood coverage at least equal to your dwelling coverage (Coverage A), or the NFIP maximum ($250,000) if lower. Citizens rules last checked Sept. 2026.
When this applies
Any Florida home insured by Citizens with wind coverage. It depends on flood zone, the cost to rebuild the home, and the policy date, not on the year the house was built.
We started with the question homeowners, buyers, and sellers ask: what is probably inside a house like mine? We used AI-assisted research to pull each rule or finding from a primary source, such as the EPA, the Consumer Product Safety Commission, a building code, a state law, or a recall notice. Separate review passes then tried to prove each claim wrong and re-read the final wording against the sources. Publisher Mark Phaneuf is accountable for the list.
AI output is not an expert review, and this list is not an inspection. We do not list repair prices, because they vary too much by home and region. Read how we research and our editorial policy. See a mistake? Email [email protected].
No. It lists materials and systems that were common in homes built in certain years. Your house may have been updated, or it may have something the list does not cover. Use it to plan questions for a licensed home inspector or the right specialist.
Does the House Decoder save my answers?
No. It runs in your browser. Your answers are not sent to us or saved. They appear only in the page address, so you can bookmark or print your list.
Why does my newer house show some older items?
Some items apply to any home, like smoke alarms or radon. Others can show up because older parts were reused or added in a repair. Each item explains when it applies.
Where do the facts come from?
Each item links to its sources, led by government agencies, codes, laws, and manufacturer recall notices. We used AI-assisted research and separate review passes to check each claim against those sources. Publisher Mark Phaneuf is accountable for the list.
Get the free Seasonal Home Maintenance Schedule
A seasonal checklist for your roof, gutters, HVAC and more, plus practical homeowner tips. Adjust the schedule for your climate and equipment.
We don't sell your email address. See our privacy policy.